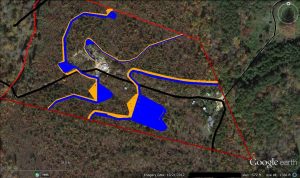
The red lines are general property boundaries, tan/yellow lines represent earthworks dams and swales, the blue areas are potential water stopped and held by the Earthworks according to general topography. These are the dams and ponds I’ll be referring to here. The general topography is going downhill from lower right to upper left, and the dams from right to left are 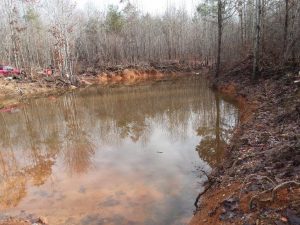
 upper dam,

 middle dam,
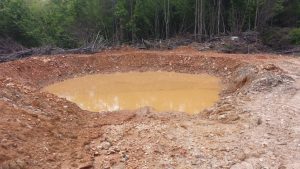 and contour pond. The pond just above the contour pond is really just a hole in the ground that doesn’t hold water, and i call it somewhat optimistically the ridge point pond. The very top pond is a potential gully dam , that may never actually be completed since it overlaps the property line and would require a joint cooperation .
__________________________________
Another very nice rain, and fortunately the 2″ prediction didn’t turn into 8″, although at this point it hardly matters, the cold keeps the ground moisture from evaporating, and whatever falls at this point is just adding to the overall totals.
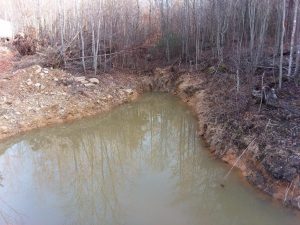
The middle dam has been raised now, and the connecting swale nicely tied in. This will allow any future water that threatens this dam to be automatically diverted over to the contour pond. This pond, which mostly has existed as a dry hole , finally started to fill with excess water from the main gully. My storages are really not totally keeping up with all the water falling, the dry days aren’t dry long enough to do any serious work with the backhoe, and the wet days are starting to defy my attempts at control, but the success of the connecting swale here means the next step is to focus in on the swale that extends beyond the contour pond. That is the next big opportunity in ground water storage and a safety valve to keep the contour pond from overflowing.
One of the lessons I have learned on a very experiential level is the old axiom about how the desert is a flood waiting to happen. When the ground is dry, the sun is hot, and machinery can work easily, it is sometimes difficult to imagine the same area overflowing with water. Thirsty plants in the summertime do not automatically bring floods and chaos to mind.
But that is exactly the situation I find myself in. It is true that I have held back a great deal of erosion. When thinking about the large volumes of water that used to scour out the channel beside the drive there is a great feeling of accomplishment, but also a knowledge of more things that need doing.
Thinking about increased fertility in the gardens, and watching new spaces for gardens open up beside the ponds fills my head with plans for the next growing season. But right now I need to look for places to put all this water that seems to be falling without end., My situation is not one of desperation since the reality of the extra water storage has made everything better overall, but now I find myself somewhat greedy.
Watching a two inch pipe steadily running water instead of flooding erosion is a nice step, but now I find a new drive to harness even that two inch flow of water.
PA Yeoman had lots of ideas about water, but probably the central theme was always “no runoff.” Watching that 2 ” pipe I’m starting to understand. It’s not that I want to hoard all the water in the world, obviously that could never happen anyway. But when that 2 inch pipe leaves the fishpond, it has nutrients that could do wonders for a garden, and i find myself thinking about the next project. Maybe this year I’ll finally get into setting up a garden down by the creek and take that water through a taro patch before I let it go.
Tying in new swales is also a way to harness that runoff, and it points to the idea that no matter how much you plan, a design is always going to evolve. The main idea is to make sure your design is not so hard and fast it gets overwhelmed with unexpected productivity.
I had thought about some sort of a final reed bed to do a filter /harvest of nutrients before the water finally went to the creek. Of course it seemed far in the future at that time but here I am today watching water escape, anticipating more fun.

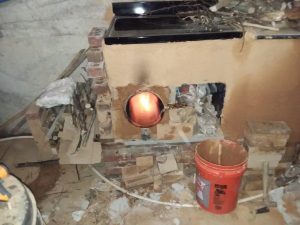 note the new visions fry pan “door” to the batch box, The lid I was using had broken into two pieces possibly from rough handling, possibly the lids are not as thermally robust as the pans
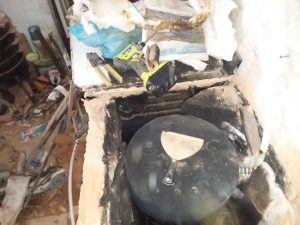 These gasses that are further cooled start to sink to the bottom as they circulate. The “stack” entrance is below the bottom of the tank in back of the system, so the exhaust comes in contact with about 270 degrees of the surface of the tank, with some minor contact top and bottom. Note that this stack is actually a powered exhaust by a very cheap, low wattage (about 10)fan. This provides a more or less guaranteed exhaust even at startup, and the exhaust is so cool (around 100F) that more robust (and expensive) equipment is not needed.
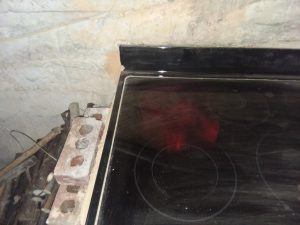 Perhaps using insulated Fire brick at the port would get the port to temperature more quickly (it is currently standard , full fire brick), and adding ceramic fiber blanket over the stove top might also enhance the temperature build up by reducing convection and radiation losses there.
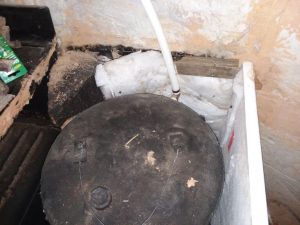 Note the opening to the left of the tank, exhaust gases travel counter clockwise around the tank once the insulated top is installed
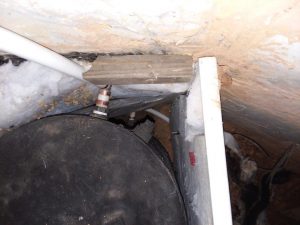 Two water connections to the tank, hot through the upper pipe, cold through the pipe that exits the enclosure botom
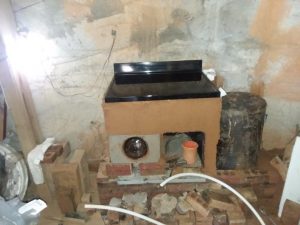
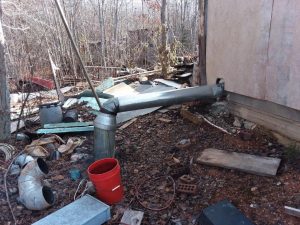 I prefer to think of the junk you see as a parts depository, the stove pipe comes up in the center of a poured concrete 2′ wall from the basement, runs horizontally, then down to the ground
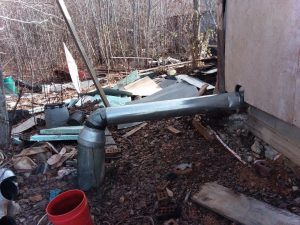 The wider area of the pipe after the angle pointing down houses a small fan,
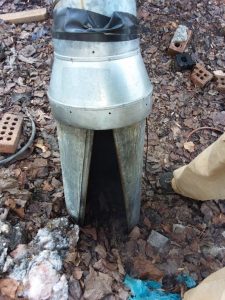 Though it looks solid from the sides, there is actually quite a wide openiong for the exhaust to exit. This configuration keeps the fan dry, allows for a small amount of falling for the exhaust as it cools, and protects pretty well against strong wind
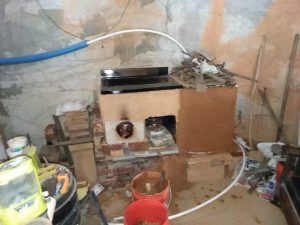 The tank enclosure has an insulated top and sides, with just enough room to circulate exhaust around and over the tank to transfer as much heat as possible to the water.
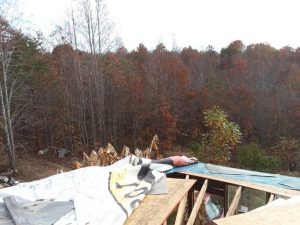 If it ain’t broke…. well, this was broke, out with the tarp, these first two roof sections are a bare beginning, with lots to do before they are in their final configuration, so you could say this is still temporary, but it definitely is moving toward a finished roof.
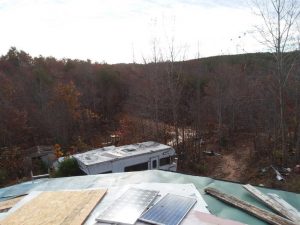 move the solar panels to the side ,slightly less power, but at least some continuity–these will be replaced with larger panels when this project is done.
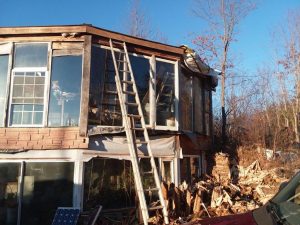 new fascia board helps to stabilize rafters
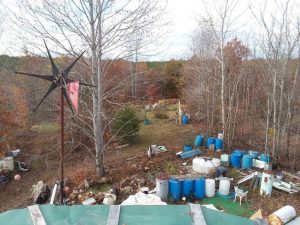 When I look around from this vantage the trash really jumps out at me. But in that “mess” is water storage, structural elements, tools and actual garbage. I know, get busy!!