When I first started to investigate spirit energy, internal processes that cannot be described, it was with listening to “masters” gurus, experts, or reading texts , the Bible, Tao, lots of time with the I Ching, and after many years trying to “become a “realized” being, finally heard something that would change my whole approach.
“Becoming” is the antithesis of “being.
As long as I was becoming, I was not Being, and vice versa, Being is not becoming.
Many people get caught in the idea – often subtle and unthought or unspoken, that they have a distance of learning to achieve some understanding in order to be. In other words they are dedicated to Becoming more spiritual, more enlightened, and yet that very drive to become at some point in the future is the primary obstacle to being in the present.
It is one thing to be pointed in the direction of realization, or being given words that may trigger the process, but once that seed is planted it grows unencumbered by rational thought. Rational thought can be a process to look for that spirit or energy, but it cannot bestow or explain the energy.
There is a road, no single highway
between the dawn and the dark of night
and if you go, then none may follow
that path is for your steps alone
Some texts or speakers come closer that others to describing the process, but ultimately attachment to any one “teacher” will only lead to attachment to an imperfect word/description. Remember
If you’re not having fun, you’ve got the design wrong:-)
So this morning , as usual, I really just wanted to be lazy, but early morning is better for transplanting so I decided to just do the 6 lettuce plants I bought yesterday. The bed was all ready, just enough spaces left, my new drill planting augur right on top of the mess and next thing was just walking outside.
On the way was the extension cord, ready to plug in for the water pump, so I did that, then I turned the valve to put some fresh water in the pond, and proceeded up to turn on the generator to fill the cistern, and while I waited decided to bring down some bulrushes that overwintered in a bucket of water. After planting them down in the biofilter I noticed another shallow pot of bulrushes and they got replanted too.
Soon the spring box was out of water so I could turn off the pump. But my travels had reminded me, and soon I was sorting and washing small river rocks to add to the biofilter–not too many, that process is tedious and boring. Finally on the way back inside the lettuce got planted which meant bringing out the watering hose.
Of course that meant watering the tomatoes and peppers in the 4 packs which led to bringing out some empty pots with soil in them from the greenhouse transplanting a couple tomatoes and a tumeric root into different pots, watering misc others, and finally watering the original lettuces I went out to plant. Guess it’s time to put the row cover over them.
Oh, did I mention the angel wing begonia that was getting leggy, so I snapped off about 10 of the “legs” and stuck them in wet sand down at the biofilter–easy enough to do, and if they root I could possibly sell the plants later–or just enjoy the flowers.
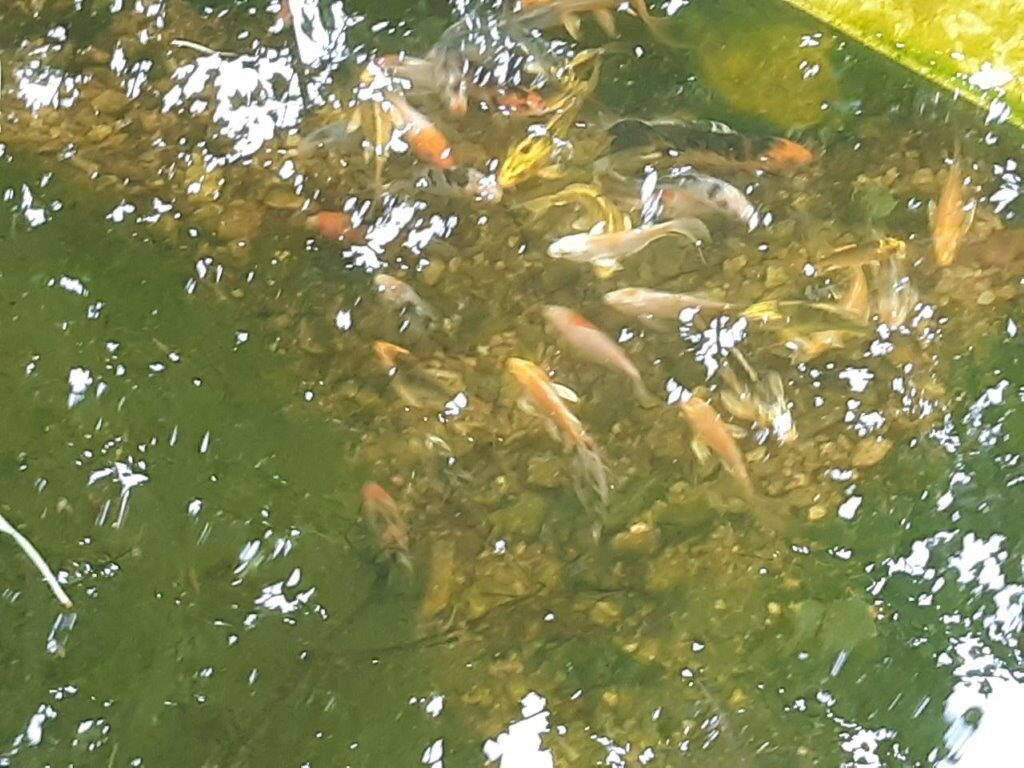
So, almost 11AM and things have slowed down a little. some more transplanting /separating Tumeric roots, washing and adding more rocks to biofilter, and lots of just sitting by the ponds feeding the fish. They were spawning the other day, hope they will do as well as the goldfish did at reproducing. Keeping the adults well occupied with feeding may make them less inclined to eat their young.
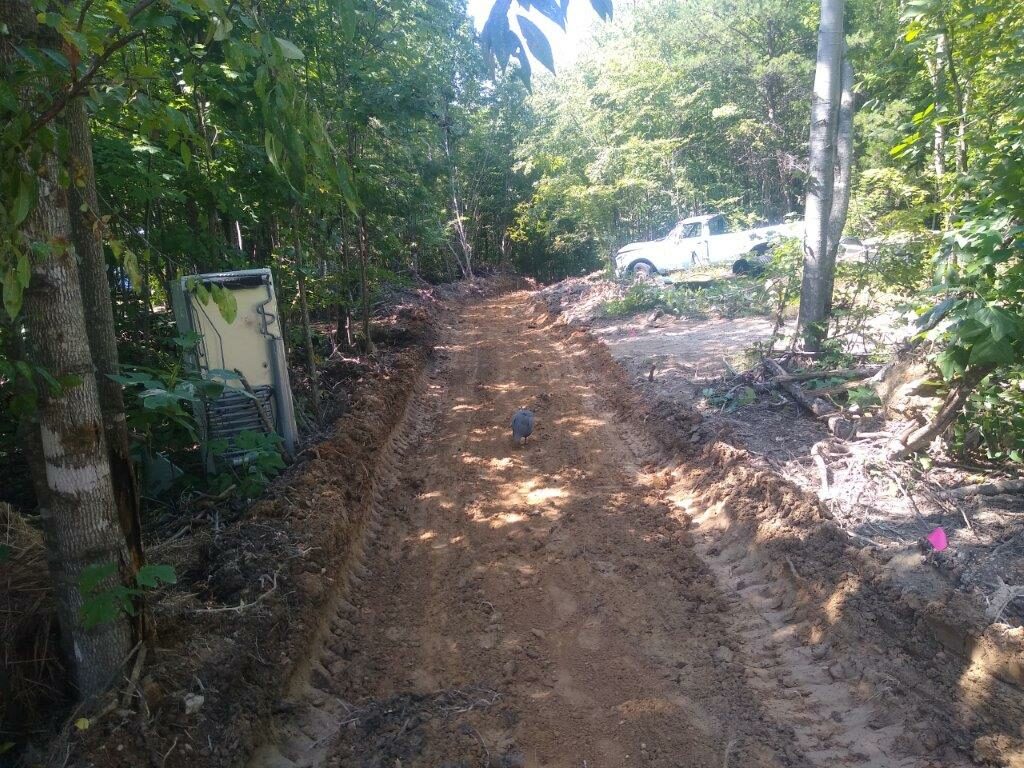
I carried tree seedlings and post hole digger down to the middle pond, but holes are difficult to dig by hand, so time to get the backhoe down there which at least helped with some of the worst roots. The rest were all put in just locating easy spots and using the post hole digger. There was also have some landscaping to do down there with the backhoe on a garden space there,
I got 12 redbud trees in at the swimming pond and tore up the garden space down there removing a tree stump. Serious manicuring of the space can wait. A little more energy and I’ll see about fixing it up- later. Lot’s of rotting logs and briers to deal with, A little hand labour and lot’s of machine work, but with a little luck the logs will help as a boundary while they rot into the soil at the pond edge holding back the existing garden soil. Likely there will be a blueberry, persimmon and mulberry tree planted on that edge. It may also get a grape vine started, and a few annuals as well.
I think there were a few other odds and ends that have been forgotten, but this is most of what happened on one day in the Spring of 2023.
This post was just a fun experiment to document some of the activities that make life so interesting here. But some of the things happening, maybe most of the feelings involve watching past activities mature. The lettuce bed for instance went through several iterations- on it’s way to reasonable soil, The bulrushes were purchased long ago, nearly driven to extinction, and now thriving in these new pond biofilters.
Everything has a story behind it, and a future ahead of it and I get to be here in the middle remembering, guiding, enjoying. And likely the best part of it all is simply witnessing the abundance all around me.
REMEMBER, IF YOU’RE NOT HAVING FUN, YOU’VE GOT THE DESIGN WRONG 🙂
Well, the year started uneventfully. Winter slows things down, time to catch up on repairs, relax inside, plan the garden for the next year, etc. etc. But sometimes random chance happens and stuff gets crazy, and so it was with me and the rabid bobcat in early February.
Then for about three months it was wound dressings, using a walker being half crippled and spending most of my energy fighting infection. Thanks to the people who drove me places, contributed firewood, and just generally showed their concern and gave moral support I was able to survive without too much extra trouble.
It did set me back a bit, planting trees that spring was both more difficult and somewhat less effective because they were delivered later than usual . Plans for a number of crab apples were thwarted when none of the seedlings survived, but paw paws and filberts seemed to do quite nicely and the serviceberry survival is somewhat questionable at this point, TWT
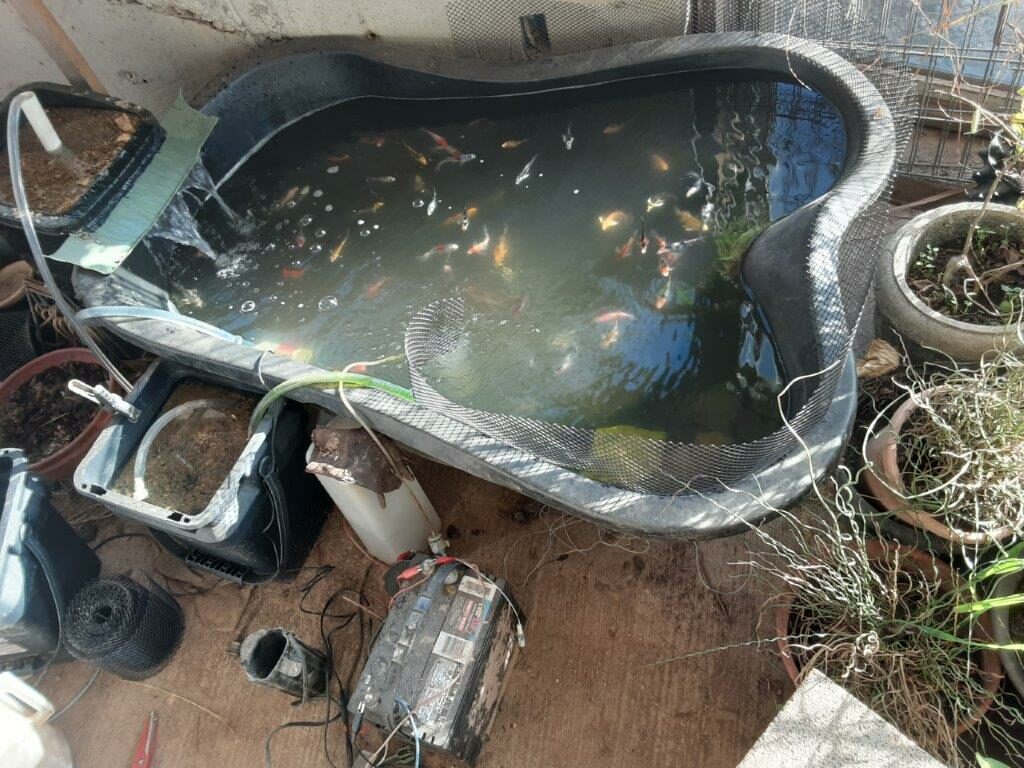
The greenhouse was the place for several tender plants , as well as where I overwintered the new butterfly koi.. Fish are pretty and these guys started to get tame enough to eat out of my hand, The main problems become the hyper need for constant aeration either with air or water pumps. Also, one issue I discovered was with feeding the fish when the water temps fell below 50.
They still wanted to eat, but couldn’t digest the food properly and I found one guy who was all but dead, and brought him inside to a warmer aquarium, and remarkably the little fish survived. I immediately stopped feeding until water temps increased and found no more floaters. So after totally emptying the first liner pond, 18 butterfly koi got released there in the spring of 2022.
The semi drought has also been worth noting, renovating the new koi pond and upgrading biofilters took lots of time away from the gardens but the ongoing building of the soil continues with or without my additional inputs. I did make a compost pile and have lots of new soil to play with when I start the garden annuals this year, and much of the clearing done for the tree planting has exposed additional areas for gardening possibilities. The rest of this post will elaborate on much of the actual work involved.
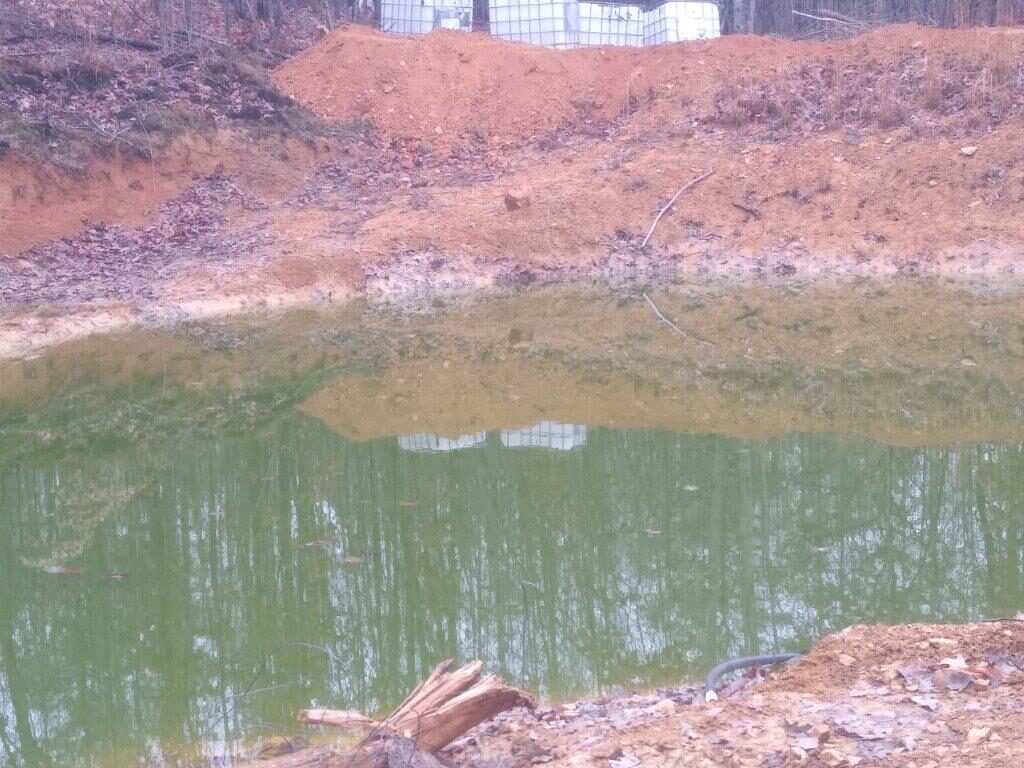
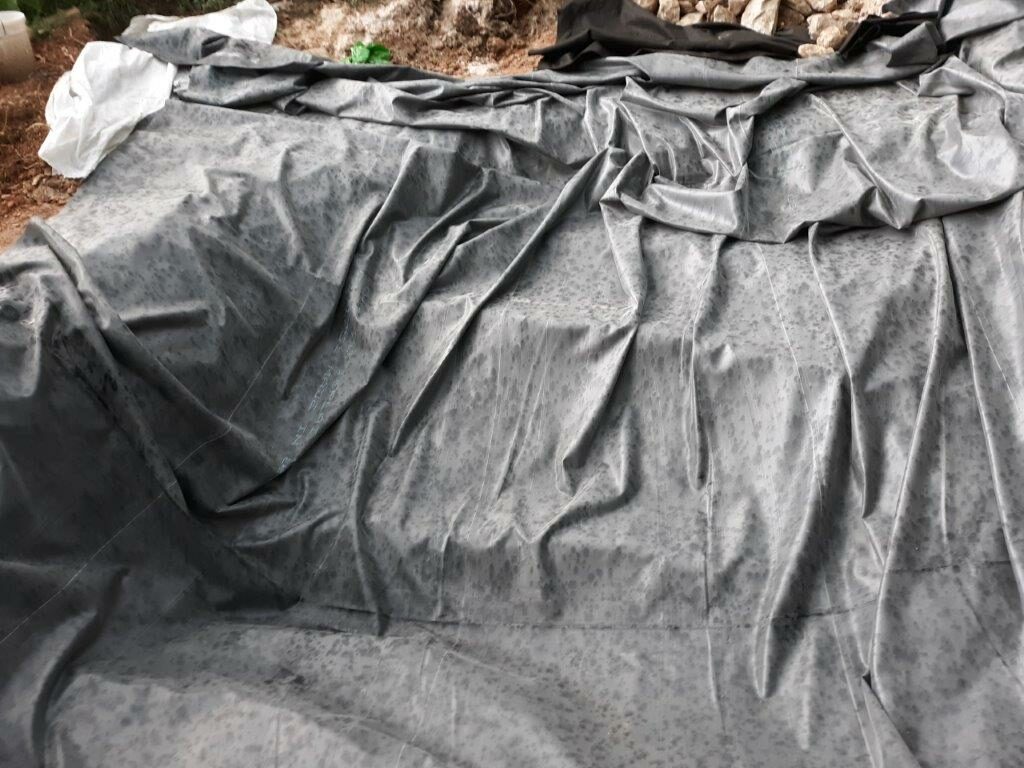
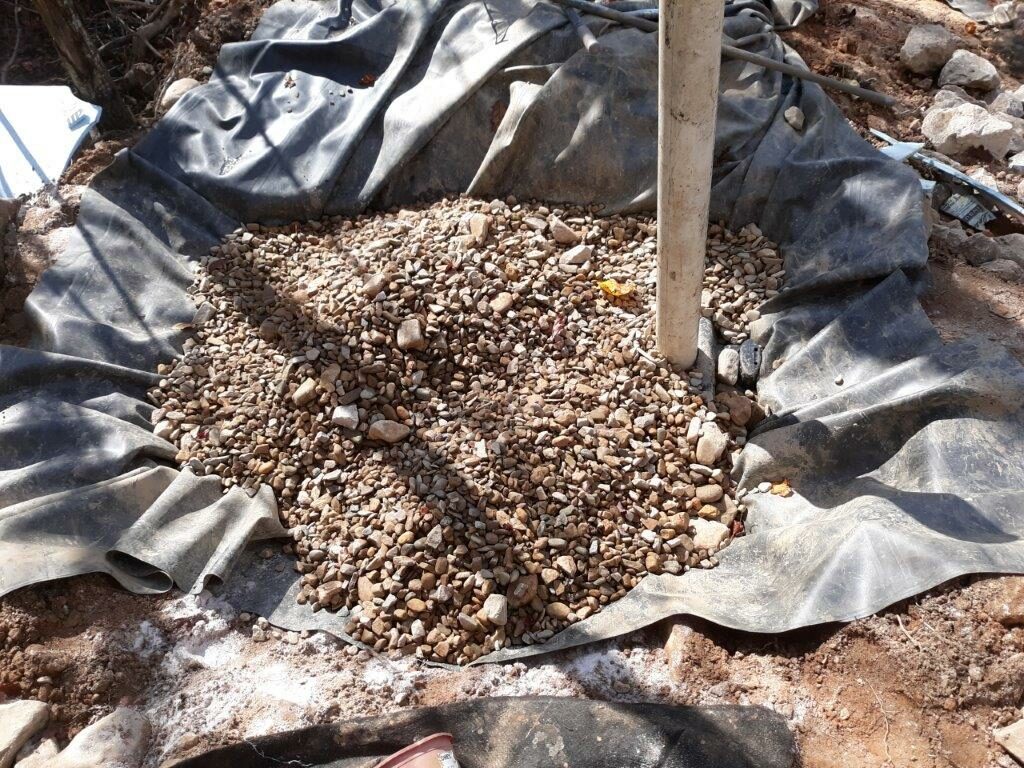
This may mean very little by itself, except as a point of development in the biofilter system for my liner ponds. Note the exposed liner between the gravel of the filter and water of the pond. Part of the process of removing the sand and general upgrade of the system meant actually taking out all the other elements, including the distribution pipes, draining lots of the water, lifting the liner of the filter and then going back to the original earthen wall under that liner and finally replacing the liner.
With a system dependent on rainwater, a semi drought in the summer can lower water levels and shut down the free flow to the filter. Lowering that separating wall and adjusting the liner between the biofilter and pond was a primary reason for the complete makeover of the biofilter. So changing the height of the water that could freely travel to the biofilter and substituting river rock and gravel for sand to allow a faster flow rate will hopefully make a big difference in water quality.
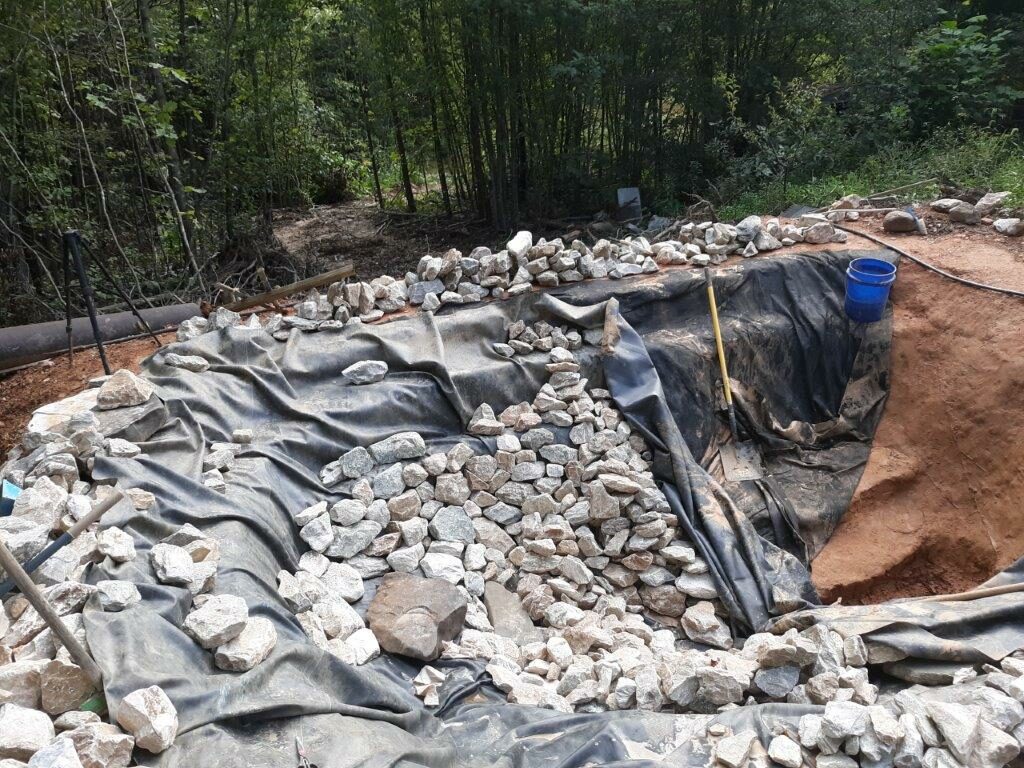
Also the pipes under the gravel are still partially exposed in this shot. needless to say this project took a couple weeks of the summer, emptying that area, sifting the sand out of the gravel, preparing the pipes, etc etc. Of course there was also lots of nutrient rich sand distributed to different garden areas. future filter cleaning will involve top removal of algae and excess plants.
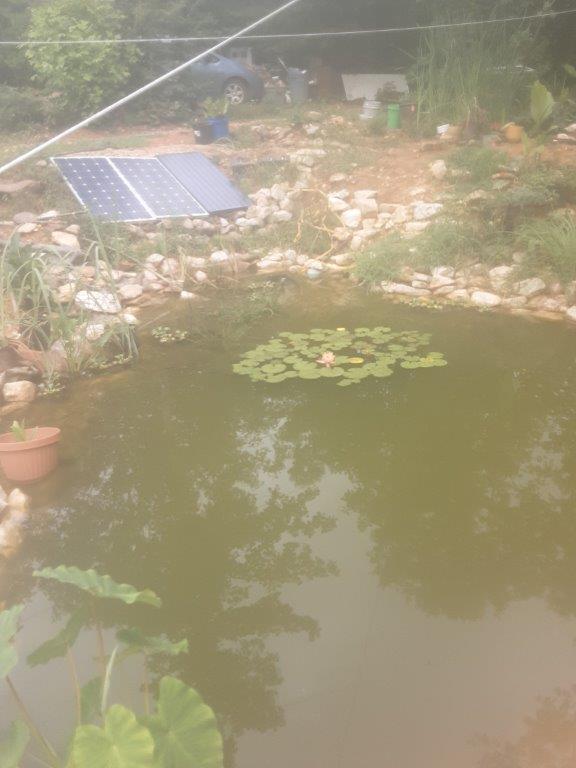
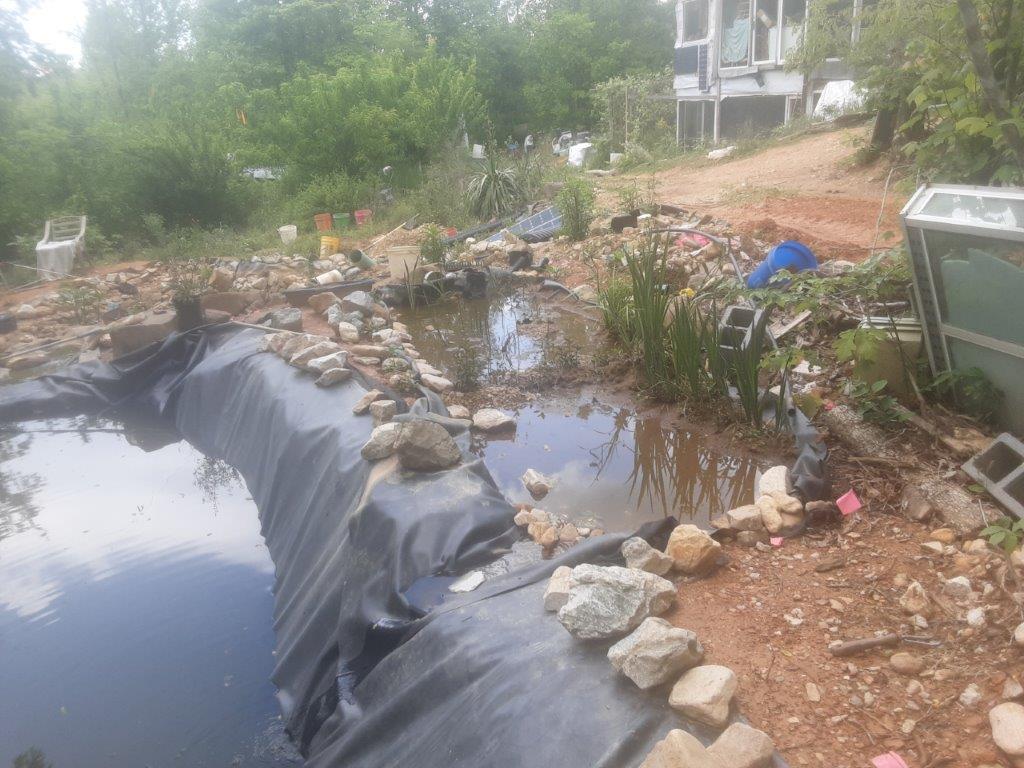
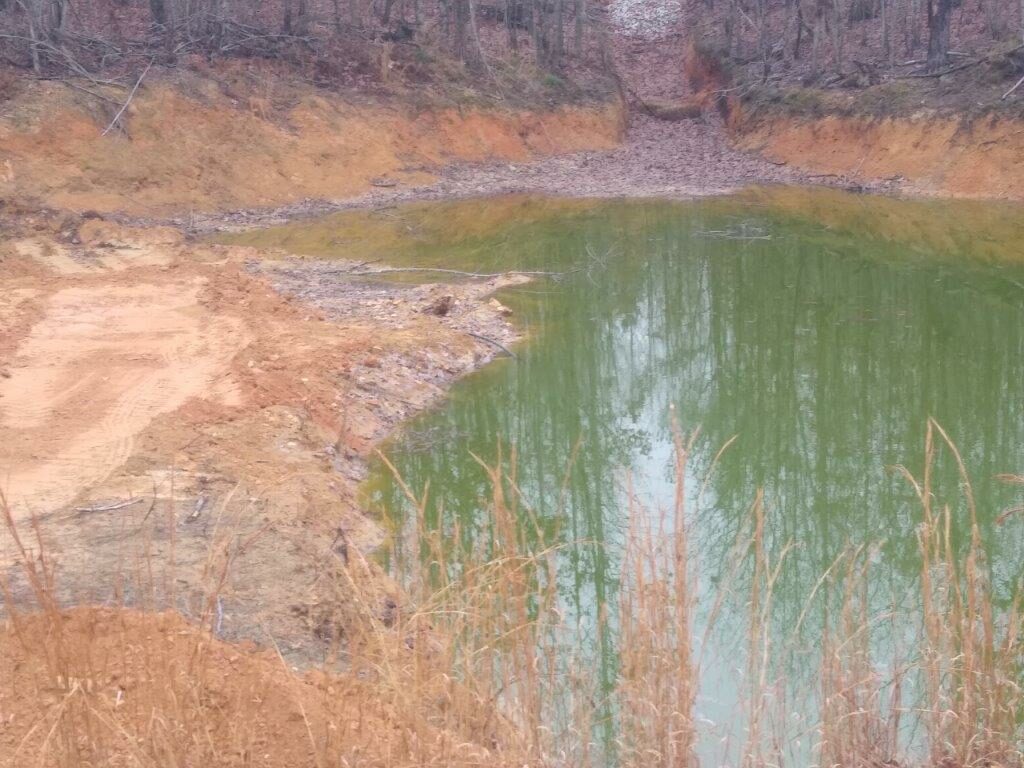
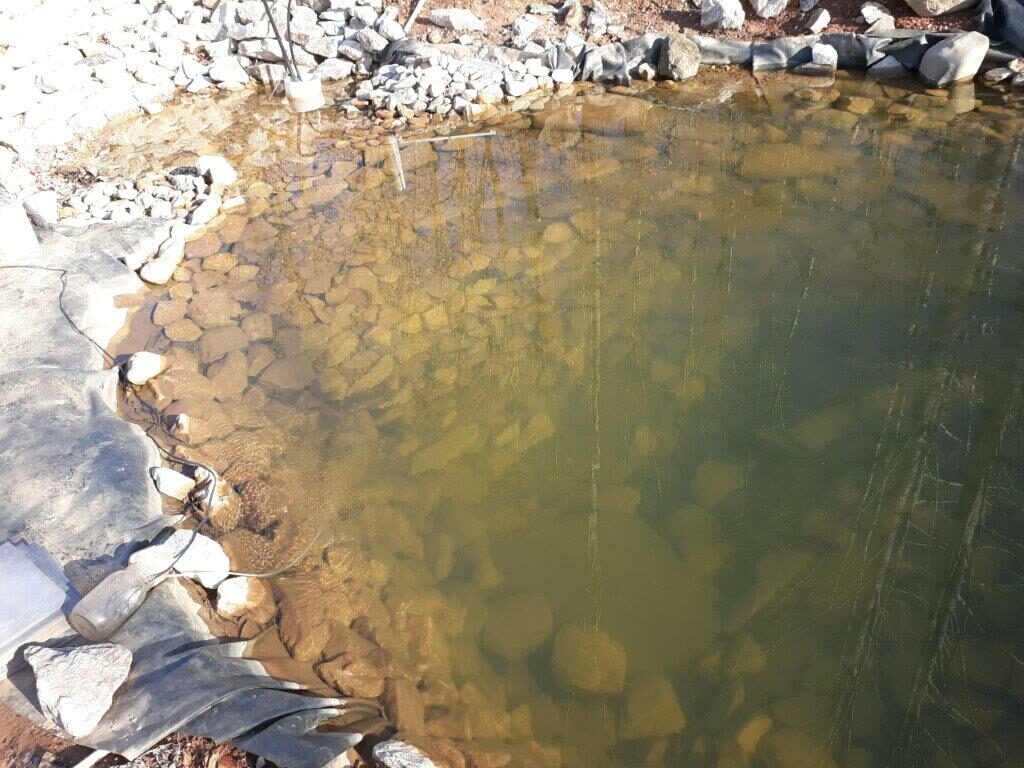
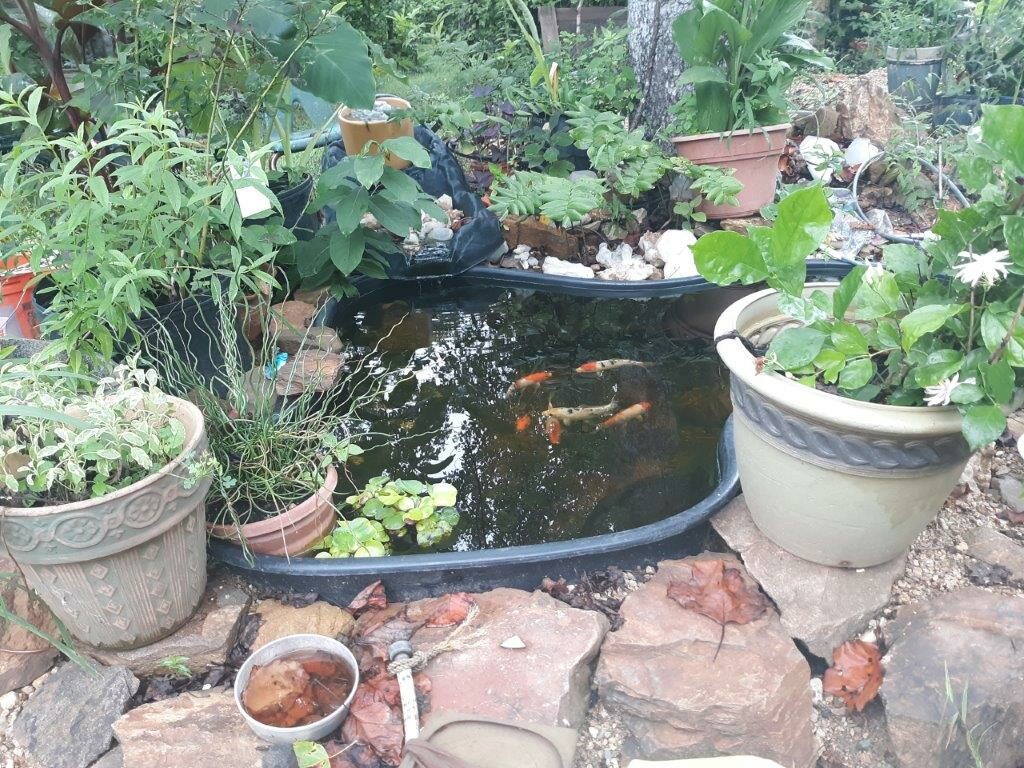
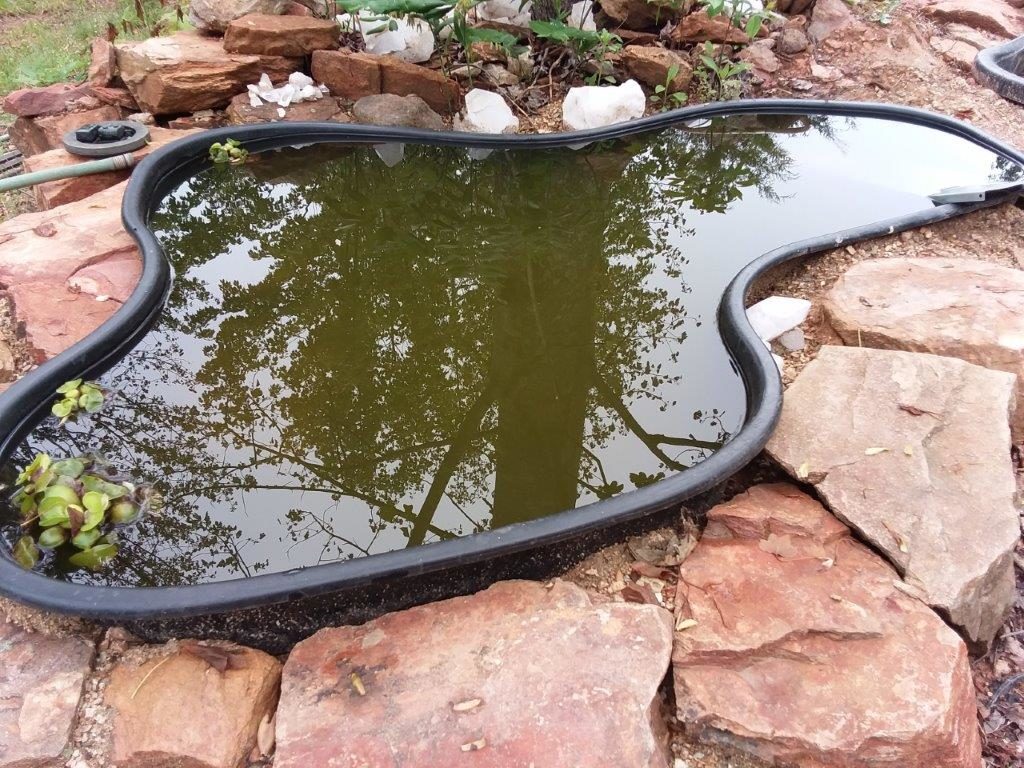
The biofilter update completed, with water lilies starting and a small number of other water plants. Each plant will aid in removing fish waste from the water with or without active pumping. As you can see, the water is not clear, indicating a fair amount of algae.
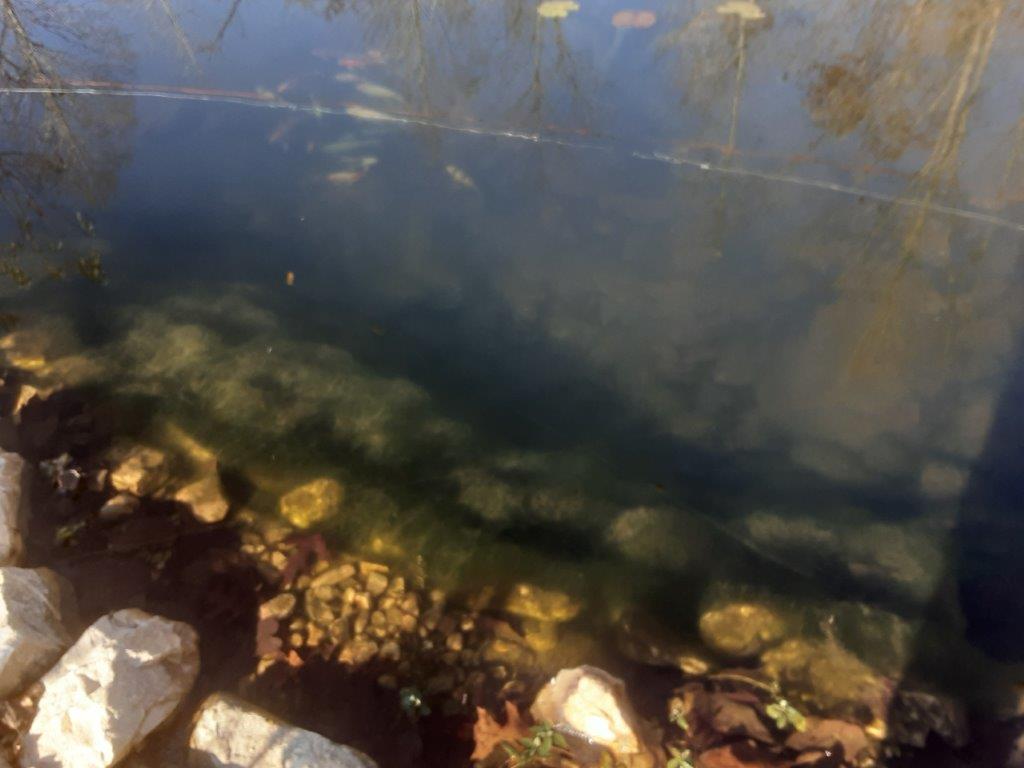
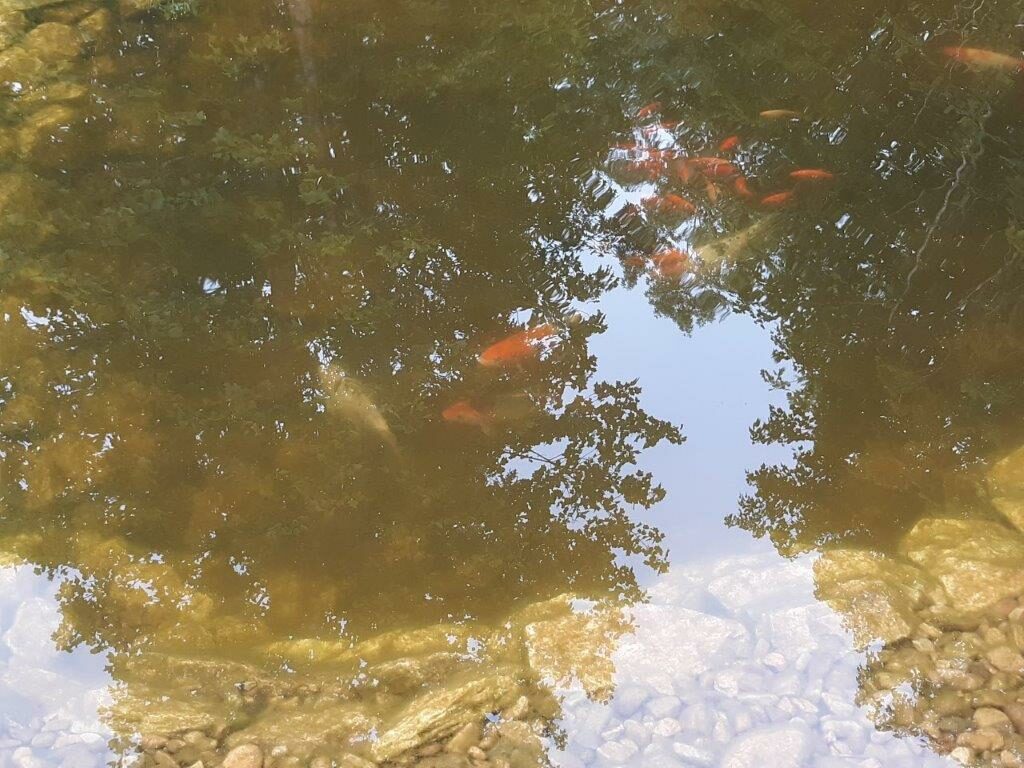
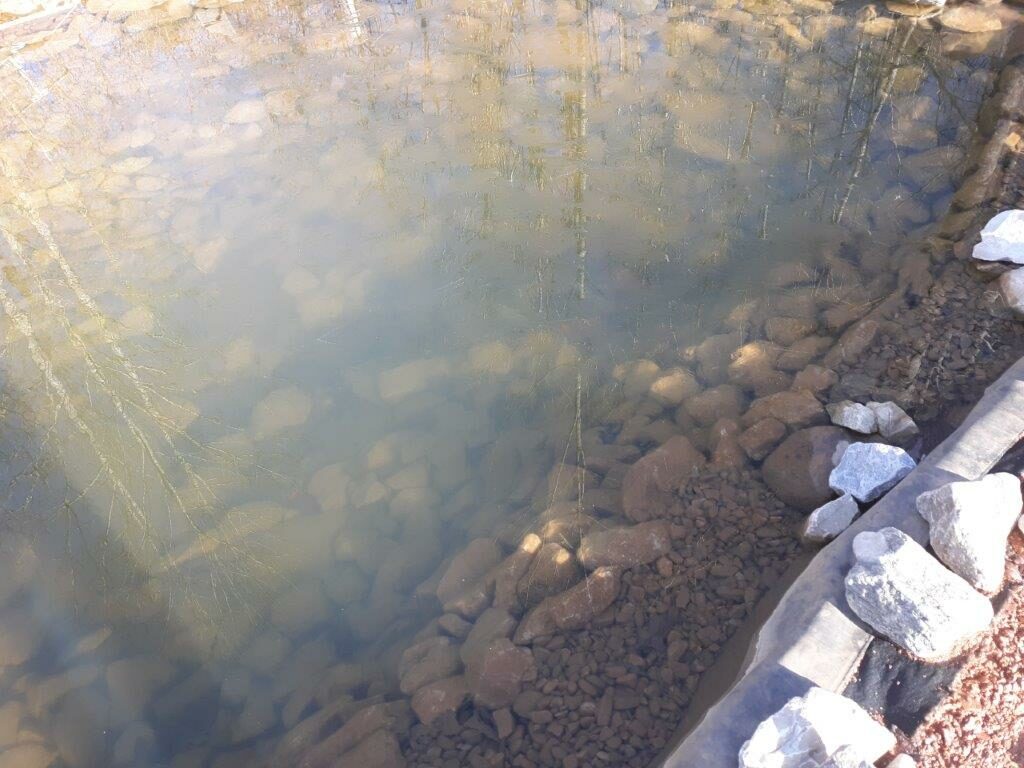
Below is a slightly different angle of the pond later in the year,careful inspection shows the colorful koi at the bottom under 6 feet of water. At one point the water was crystal clear. Also notice the fine green string algae covering all surfaces. While many people might consider this messy, it can actually be beneficial as a water clarifier when controlled by some periodic removal. The removal can be coupled with fertilizing land plants with this high nutrient algae fertilizer free of weed seeds.
It is important to note when thinking of plants as water quality control, moderation is a consideration. Without some periodic removal of algae and plant matter, the natural inclination of ponds is to fill in, so keeping water spaces clear and oxygenated for the fish is important. It’s all about balance. Also, dead plants rot and consume more oxygen challenging the survival of the fish.
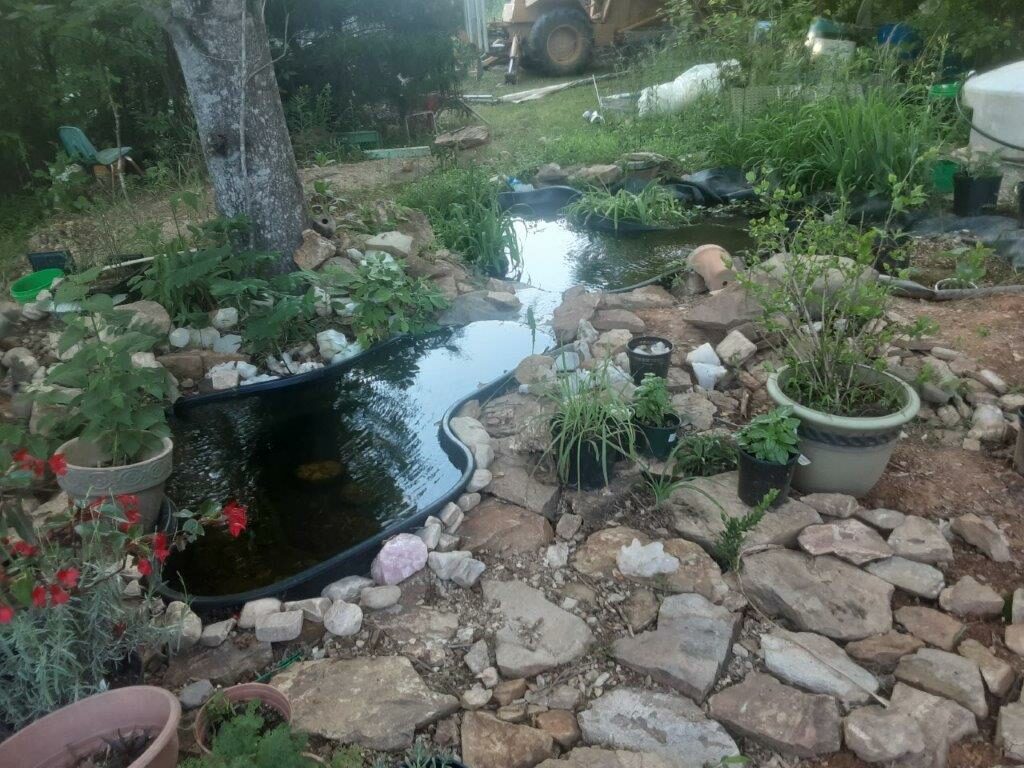
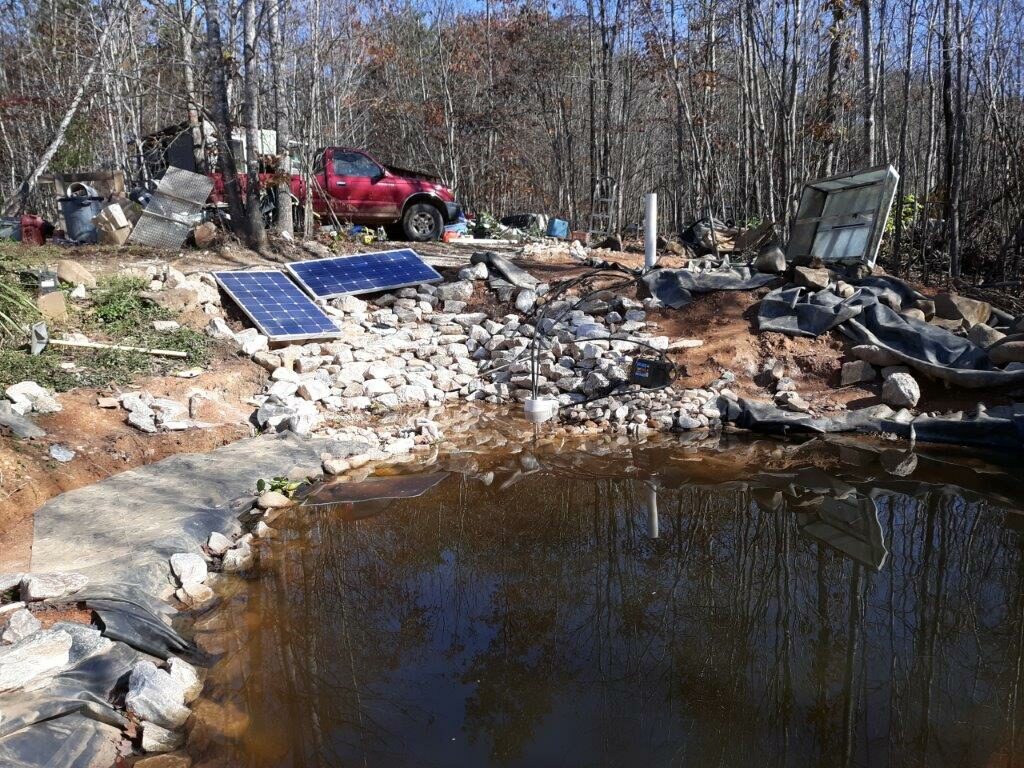
new liner pond(left) and enlarged biofilter (right)
The first part of liner pond work last year involved these two projects. The 6 big koi living in the first liner pond were transferred to this newer one, and the original biofalls filter from last year was changed to include the new pond as part of the circuit and the original waterfall biofilter (shown right)was increased in size. This filter proved quite successful, and cattails sweet flag,water iris and horsetail filled the bed by the end of the summer–fish waste is wonderful fertilizer. Obviously this was an initial setup to keep the 6 big koi happy while the 18 smaller butterfly koi were given occupancy of the original liner pond. The shot below shows the same pond and biofilter with a little growth and added window dressing.
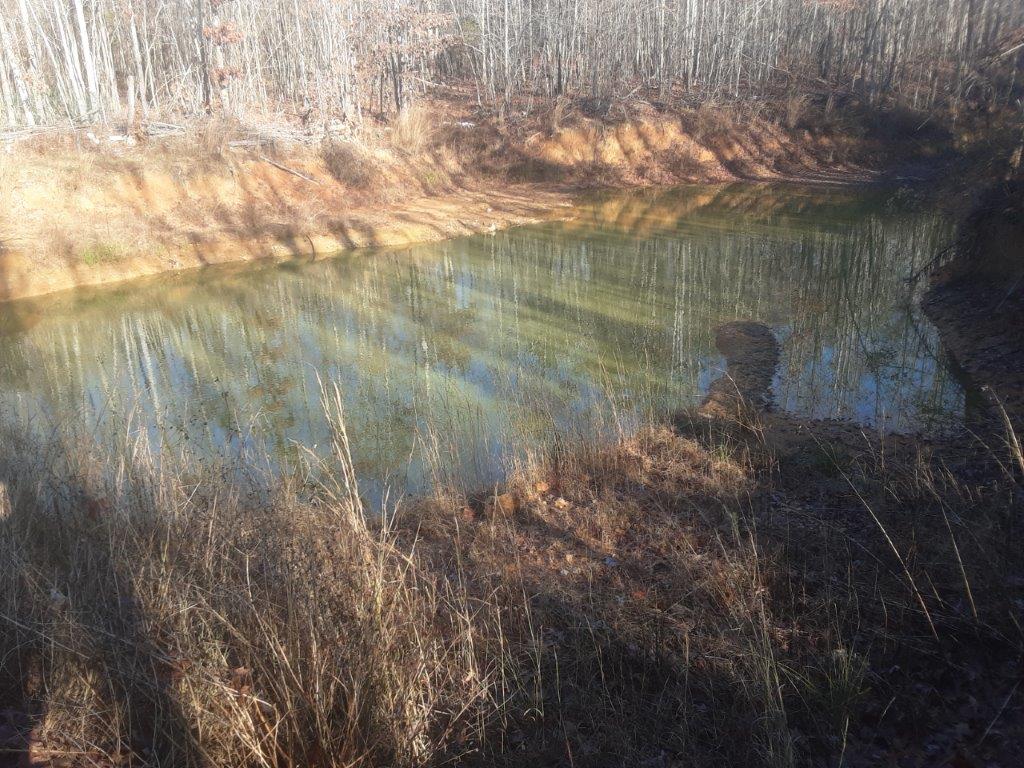
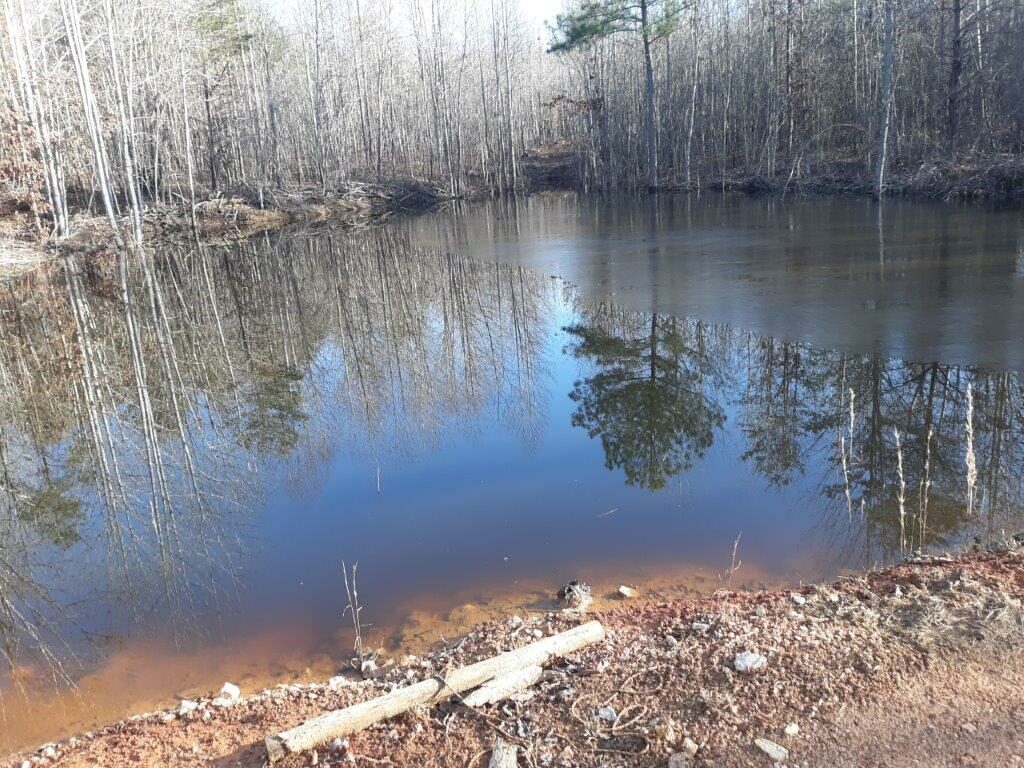
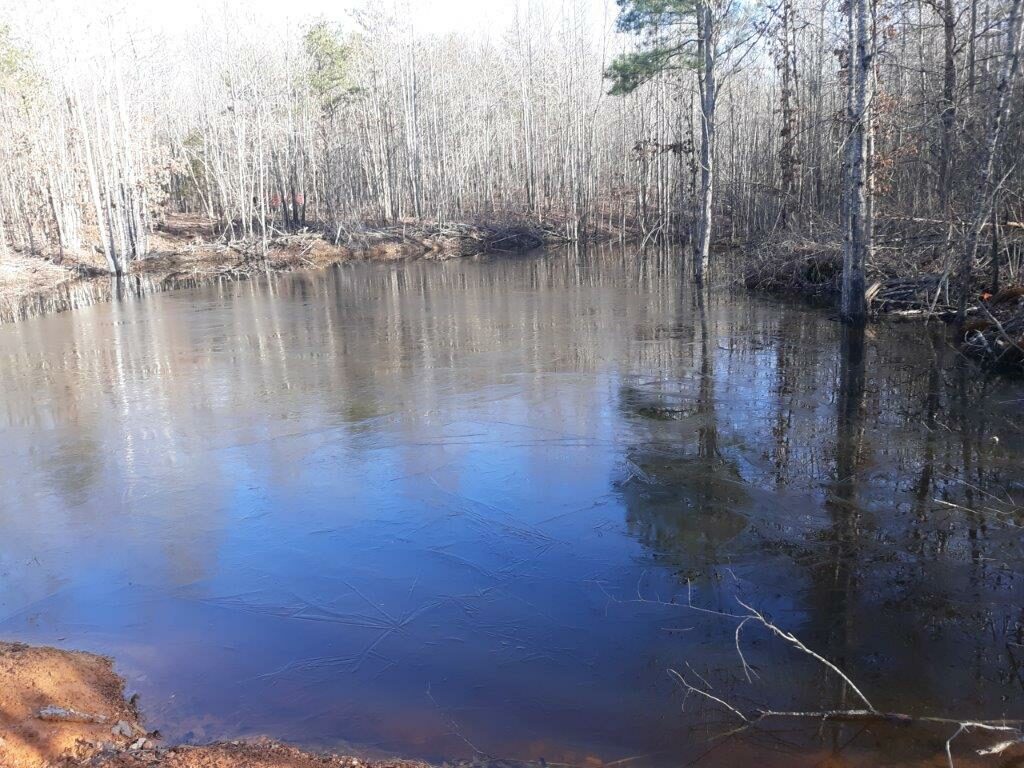
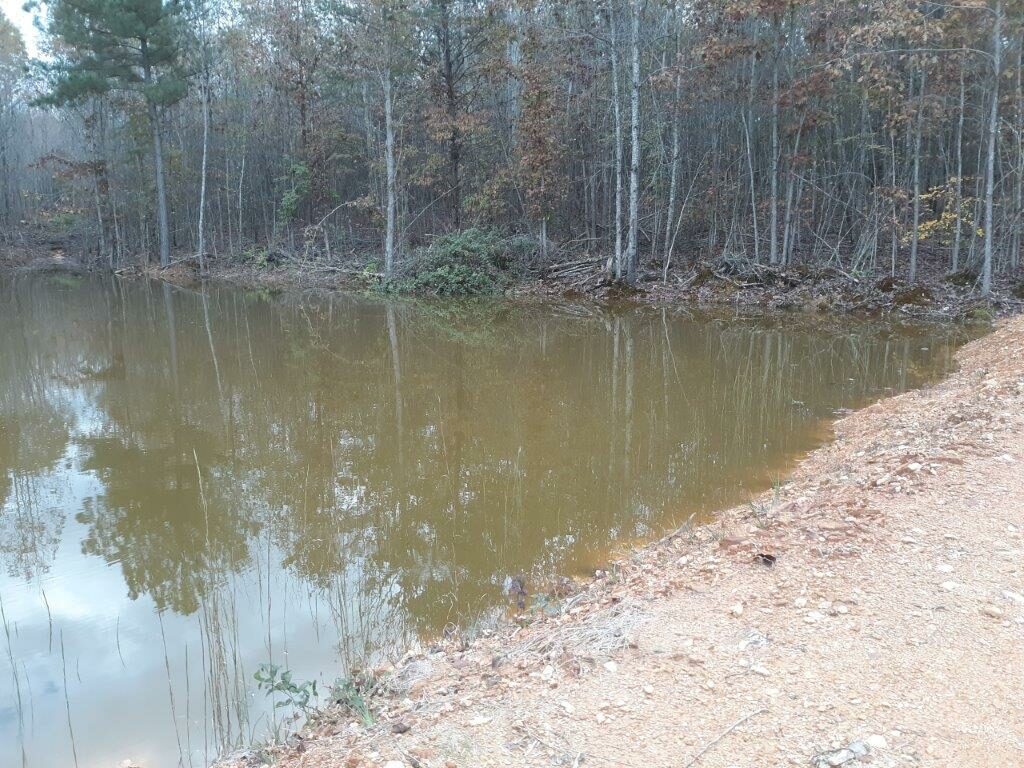
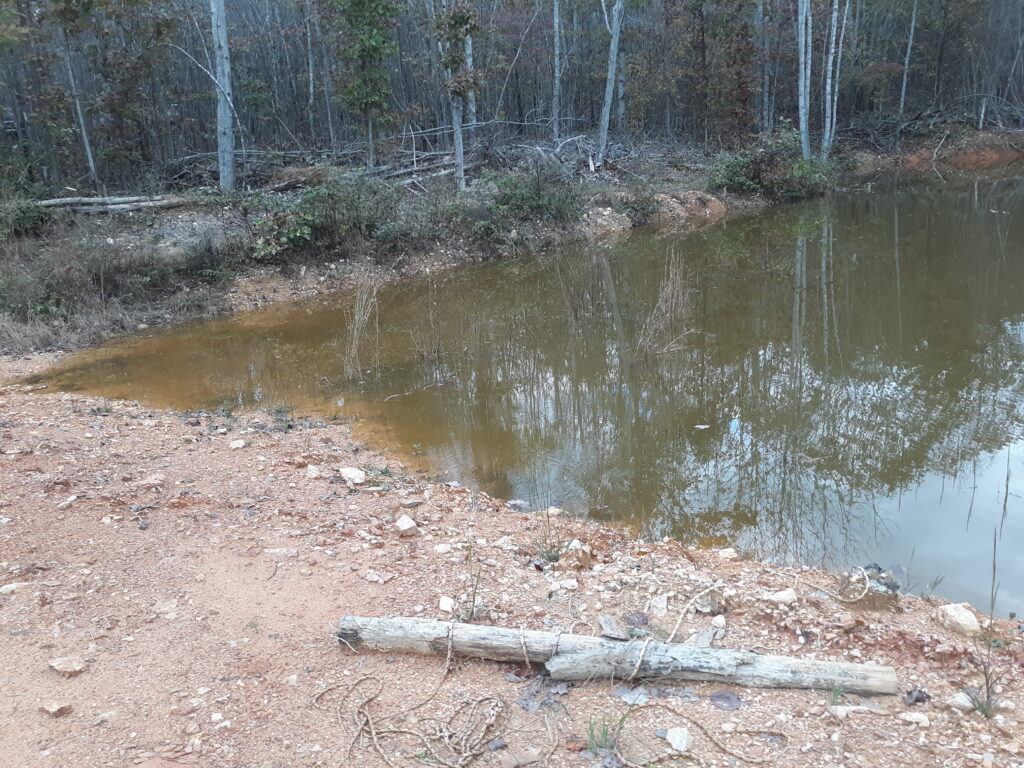
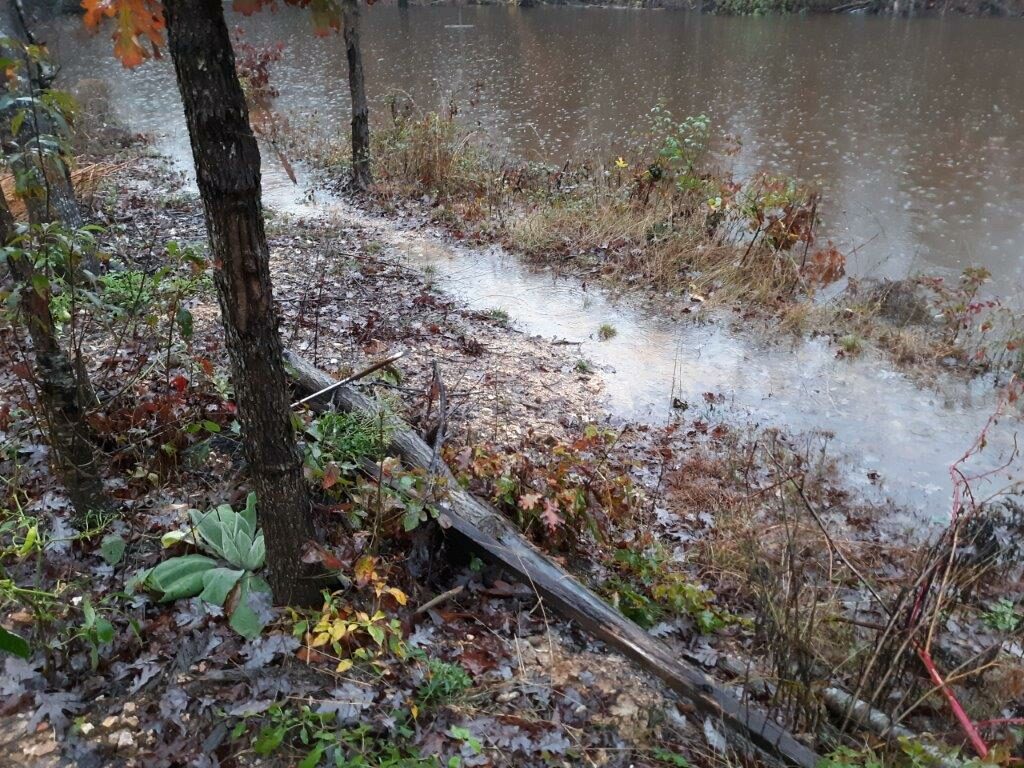
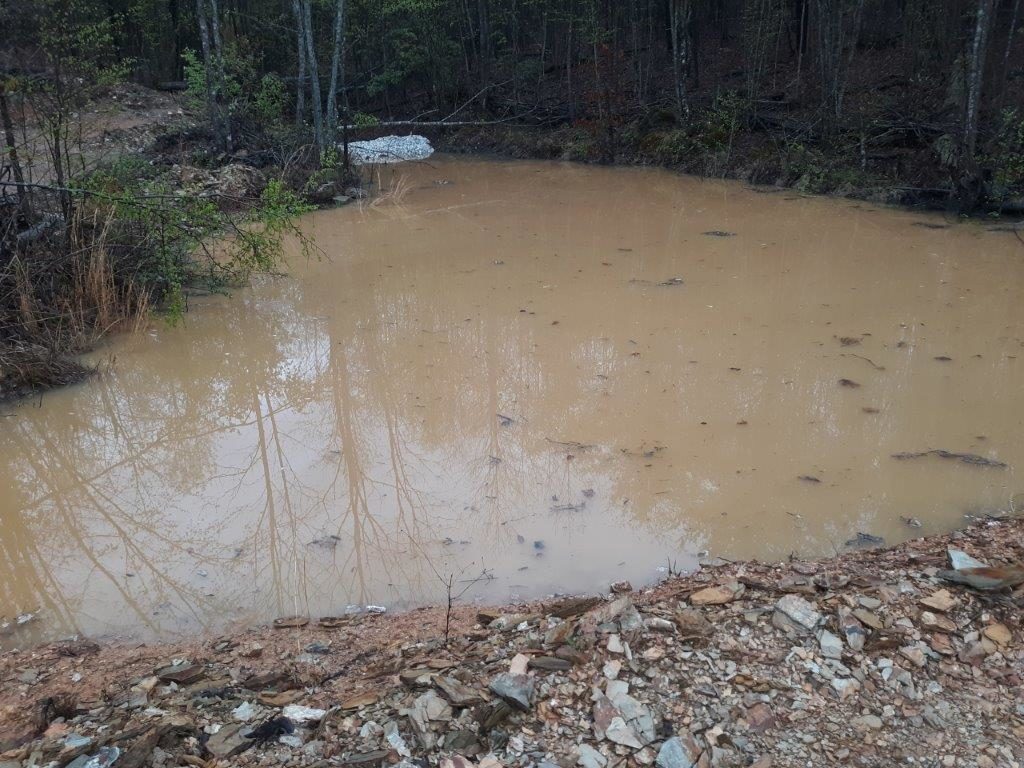
And now the overarching theme of the year was drought. When this pond is full the bare brown walls are under water, so the overall depth of the water is less than two feet at this point. I think there are still catfish alive here but I’m afraid to feed them until there is sufficient fresh rain water flushing things out a bit.
Theoretically systems like this mature in about 7 years, but the actual timing of this project is off by about three years. An overarching drought/wet cycle of about 7 years seems to be the norm here. So while building the dam, fighting with excess water was a common occurrence. The current lack of water in the cycle now that the dam is completed means there is not sufficient water to saturate the surrounding earth and help the system mature. My hope is that this year will start the move back into the wet part of the cycle.
Of course I have already started enlarging the pond, so the longer it stays dry the bigger the eventual size becomes:-).
I will say that even with the lower water levels, this relatively dry hillside and gulley is starting to show signs of a wetland, Cattails are moving from pond to pond, and with minimal effort goldfish are expanding their domains.
Well, it’s been a while (as usual) but it has been pretty eventful, especially for winter when things are supposed to slow down. New experiences for sure with a little extra knowledge, and I guess that could be a positive side of every new experience.
Ever been bitten by a rabid bobcat?
Now I can say that I have been. I’m not sure if the knowledge I’ve gained will ever be useful or not, and I’m not even sure if it’s behind me yet. My hope would be that at this point in time I think the worst is over. I’m up and walking again, working more and more each day and gradually getting back into the swing of things.
Of course there were periods when I was fighting the infection where I wasn’t sure if I would ever walk again. Cat bite infections- even tame house cats are evidently very serious affairs, and my lack of awareness led to cellulitis which can do a lot of damage.
Even though I pride myself on natural remedies, and was boldly telling the doctors that I didn’t need their antibiotics, after about three days watching the infection spread, I got that prescription filled and was sorry when it ran out, but continued trying to treat what was left of the infection with my garlic and goldenseal…
Fast forward a week or so and I was going to another doctor to get a new prescription.He saw me three days in a row and was quite concerned about sepsis which can evidently kill you. Lab tests turned up a cat bite bacteria the prescribed antibiotics weren’t effective against, so add a new antibiotic to the regime .
Fast forward a bit as the infection was getting under control and I was going back for another prescription because I wanted ALL redness and swelling gone before I gave up those miracle pills.
I’m not saying natural antibiotics don’t work, the theory is that they should work even better, but in trauma experience Doctors certainly have an edge on us natural healers. I’m only used to dealing with small cuts and sprains-simple stuff, So maybe the lesson I learned is to not be so casual about treatment in really serious stuff.
A dose of golden seal powder here and there, or chewing on a garlic clove now and then needs to be replaced with serious overdoses of garlic and regimented ingestion of your natural antibiotic of choice, which brings us to the next item of business.
If you’re purchasing herbs to use in medical type treatments, use only trusted sources-Better yet, your own home grown and processed herbs will be more reliable than almost any store bought.
I certainly can’t advise anyone what to do about any treatments for anything, but I can certainly suggest not to take any cat bite lightly. The reality is a cat bite can lead to a life or death situation, not so much from the wound itself, but more from those microscopic critters that might get planted under the skin in a puncture wound- especially from a cat.
Well, I have no excuses for what is actually an incomplete coverage of all that has been going on this past year, but I did take sporadic photos and will try and fill in the actual progressions of the various projects.
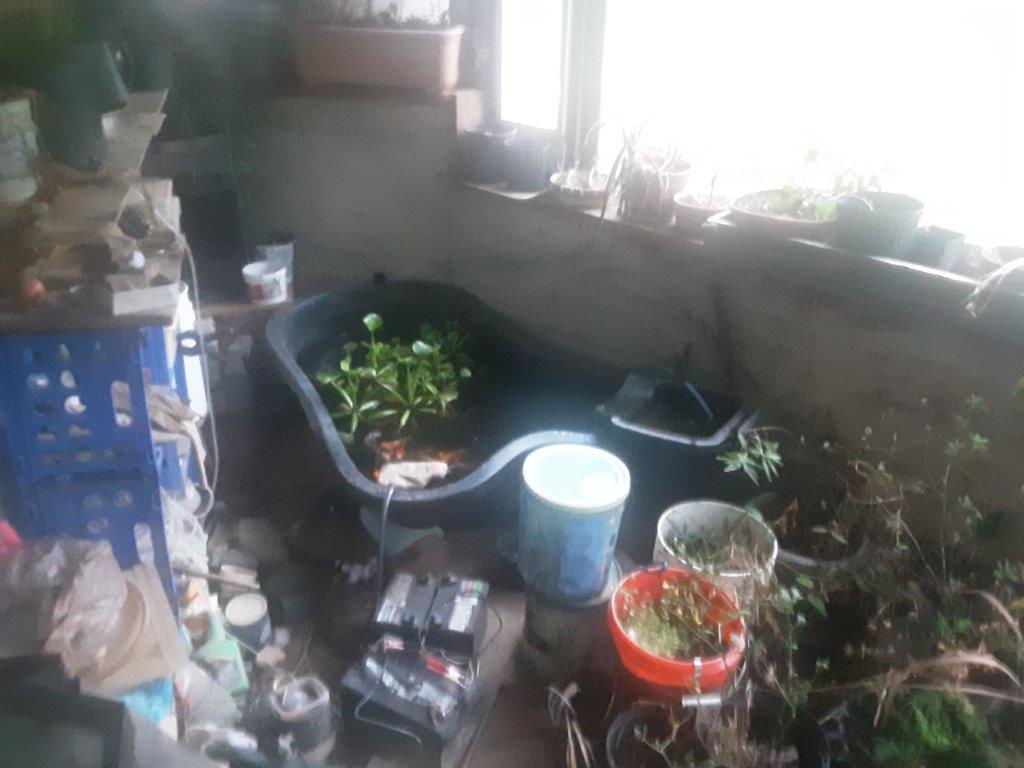
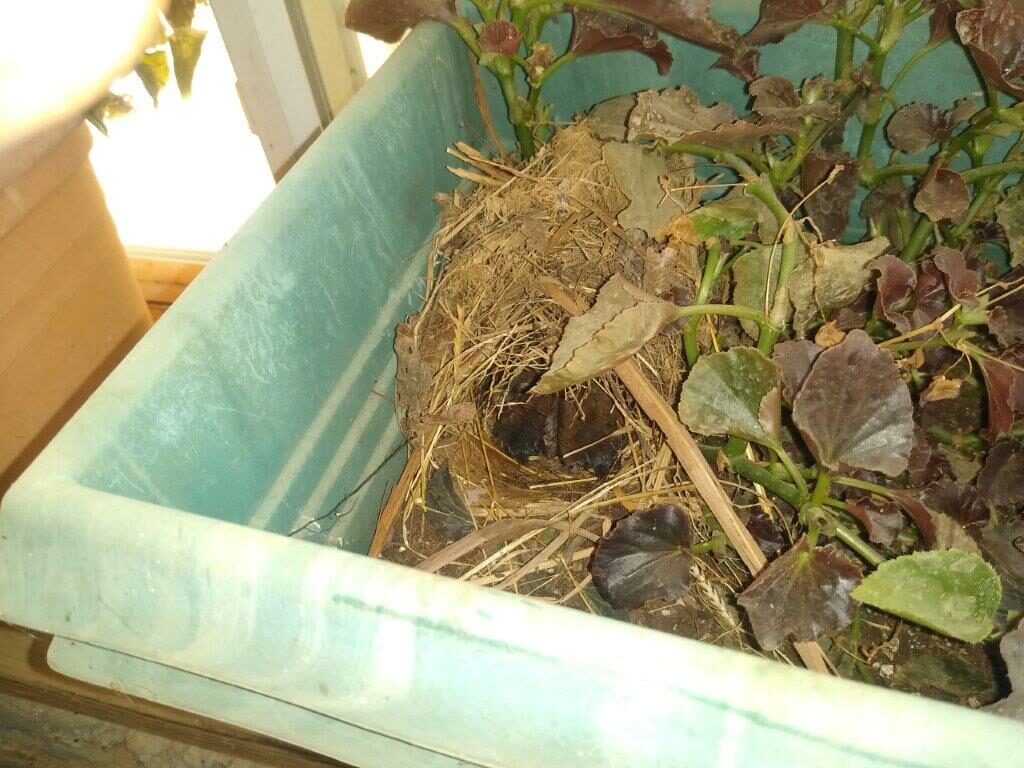
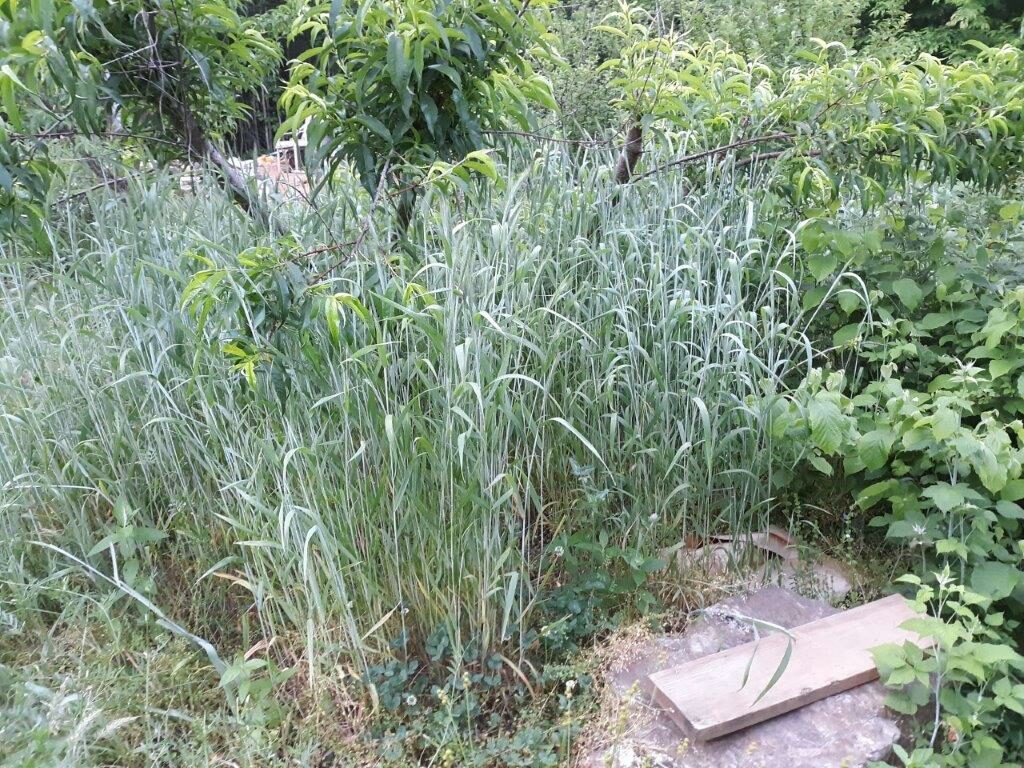
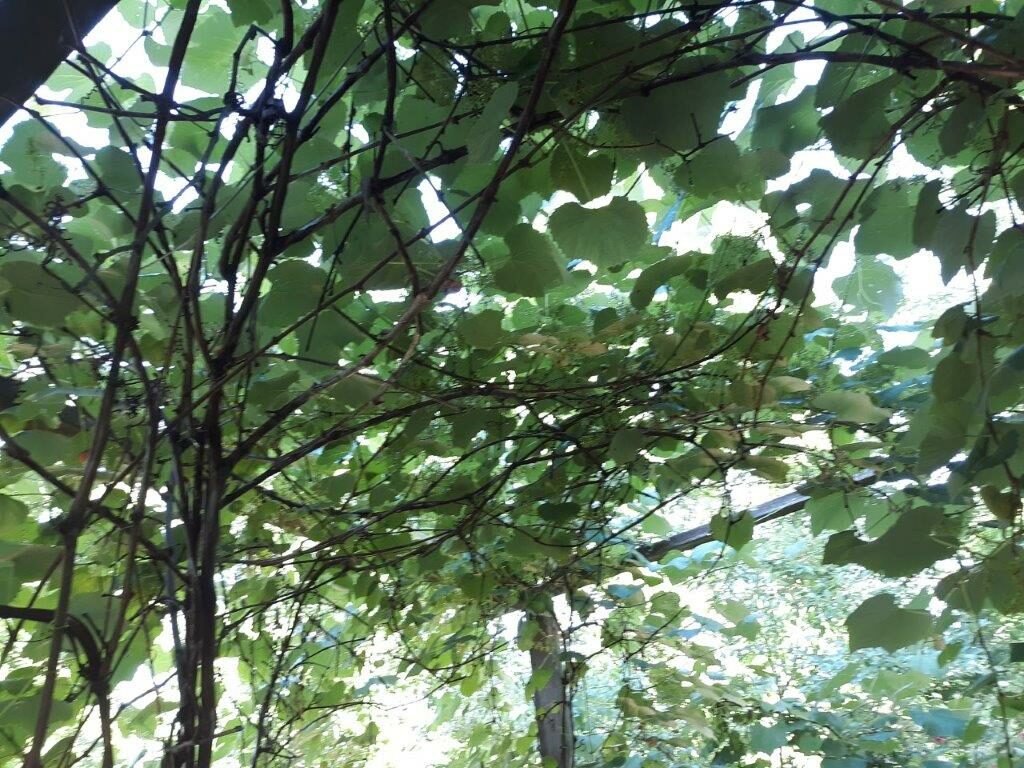
Greenhouse koi project begins with 75 2&1/2″ fish everything put together from odd buckets and cheap air and water pumps. The improvised biofilters performed quite well keeping the water pretty clean for the three or four months they were in this small pond Here are the new babies-butterfly koi moved to their outside summer accommodationsTo the right of the small preformed pond is a biofilter, the pond water spills into it, passes through sand and is pumped out to recirculate. It worked very well when it wasn’t leaking. The waterfall for the bigger liner pond. It’s a rough looking first try, but served well through the summer.Note the solar panels that power the waterfall, and the biofilter between the pond and the panels.The second biofilter is to the right of the panels at the top of the falls. The ornamentation of the area was an ongoing project through the summer. This is closer to the fall and work on a second pond is started.The plan is to have the two ponds connected in the same filtration system. The second pond is slightly higher than the first and the system will have better filters and be easier to maintain.These baby birds are being raised in a planter inside the greenhouse, some sort of wren I guess, and she came and went often enough to raise them to maturity even though the doors were often closed. Periodically she would show herself and sort of be asking to go out This winter wheat volunteered in the garden, I don’t quite know how it got there, but I discovered it by the smell of it when I was cutting the grass, so I stopped cutting it and let it grow as much as it wanted, will be interesting to see if it comes back next year, I never did manage to catch it at the right time to harvest any,This is the large “catfish pond last January. A drought of sorts started in late spring and the pond lost 80% of its water. Then an 18” rainfall in 3 hours filled it back to overflowing, but as the summer progressed, the pond emptied again.This is a recent picture, note the ramp on the left allowing access with the backhoe to enlarge the pond a little and get some more clay for the dam itself.Note the mound of clay in the upper left center of the picture. This builds up a partial low spot, and fills in that corner. It still needs some shaping and compaction but the weather has changed and we’re starting to get some rain. hopefully I’ll get a couple dry days when I can do a little more work with the backhoe.This shows the connection between the existing swale that stopped about at the truck and the pond that is directly behind the camera Too bad this wasn’t done before that monster rain 🙂Yes, The trellis needs a bit more work, but this year the grapevine automatically shaded the glass on the south side of the house. The only downside is failure to harvest in time will have swarms of bees etc. I ate as much as I could every day and finally gave a bunch away.
OK, I think that’s enough for one night. Obviously there was a lot more going on last year, and with a little perseverance maybe I can actually bring the year into better focus with some further posts.
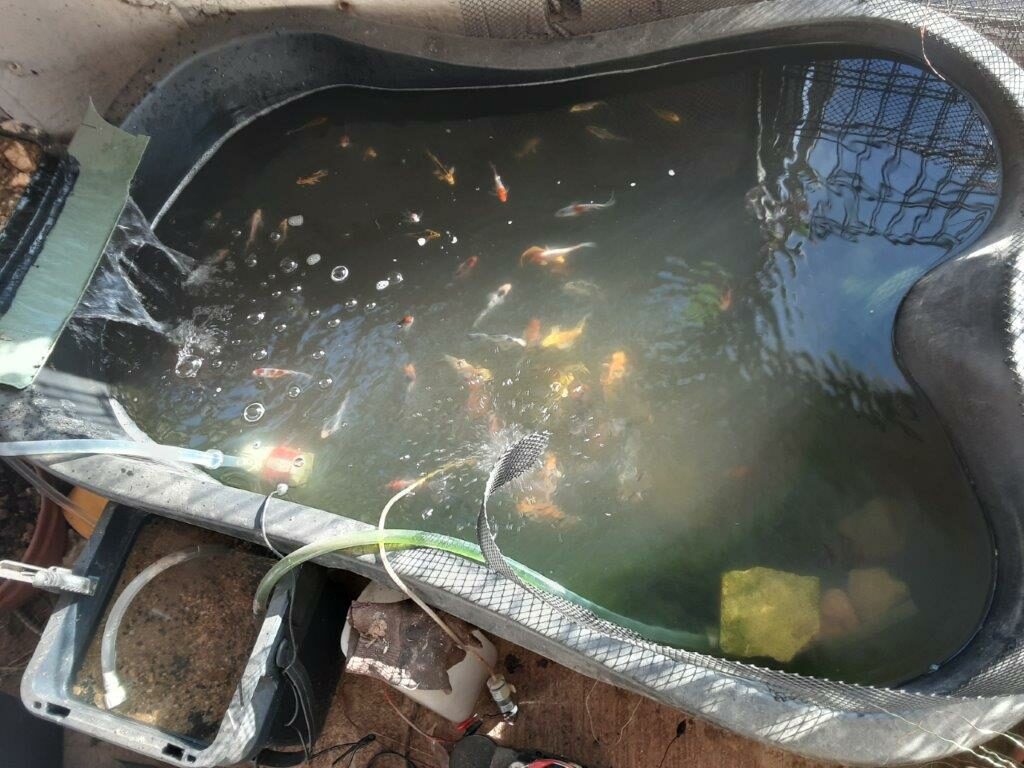
the baby koi have a new home bigger koi looking for food In the pond I built last fall
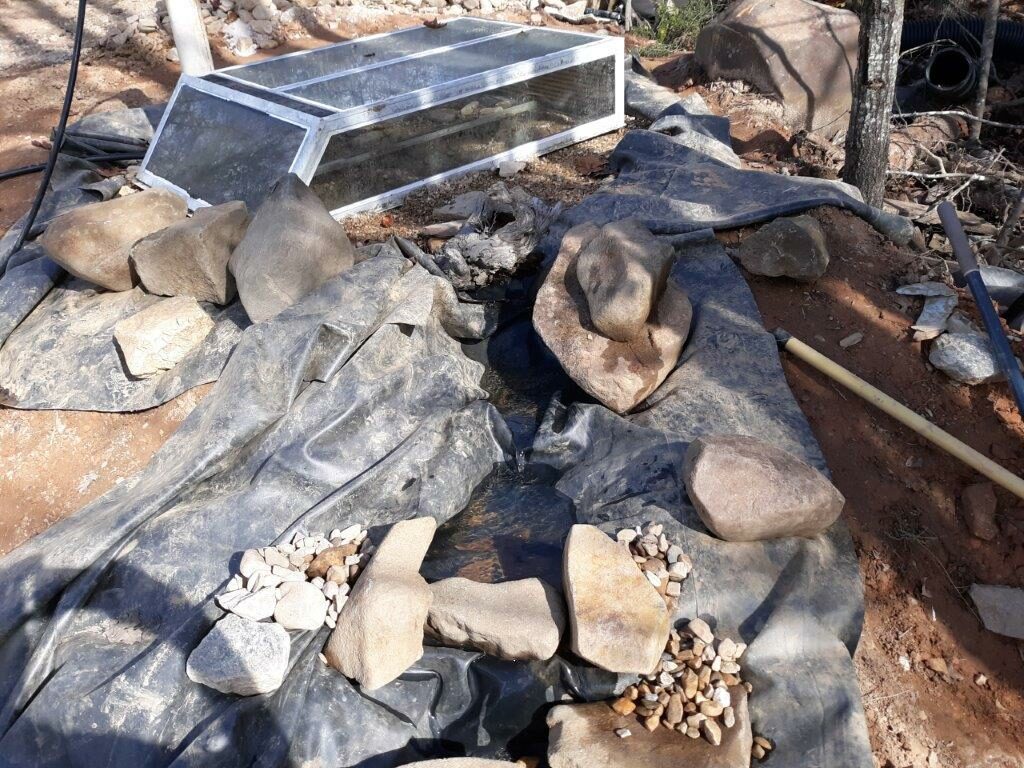
waterfall feeding pond
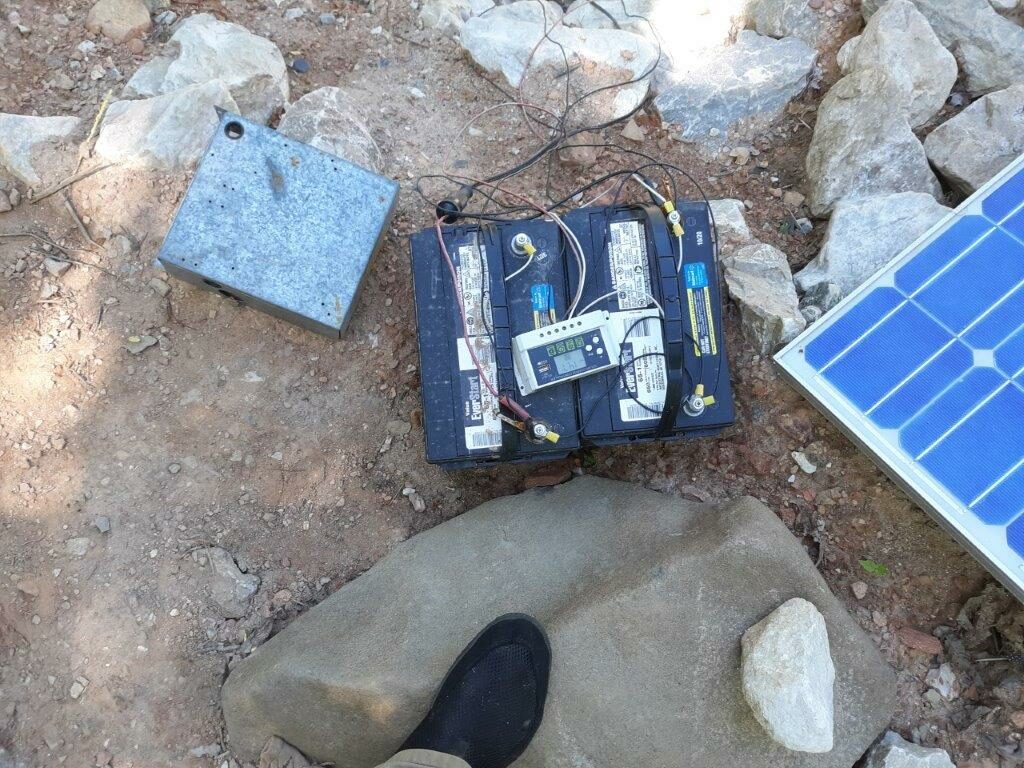
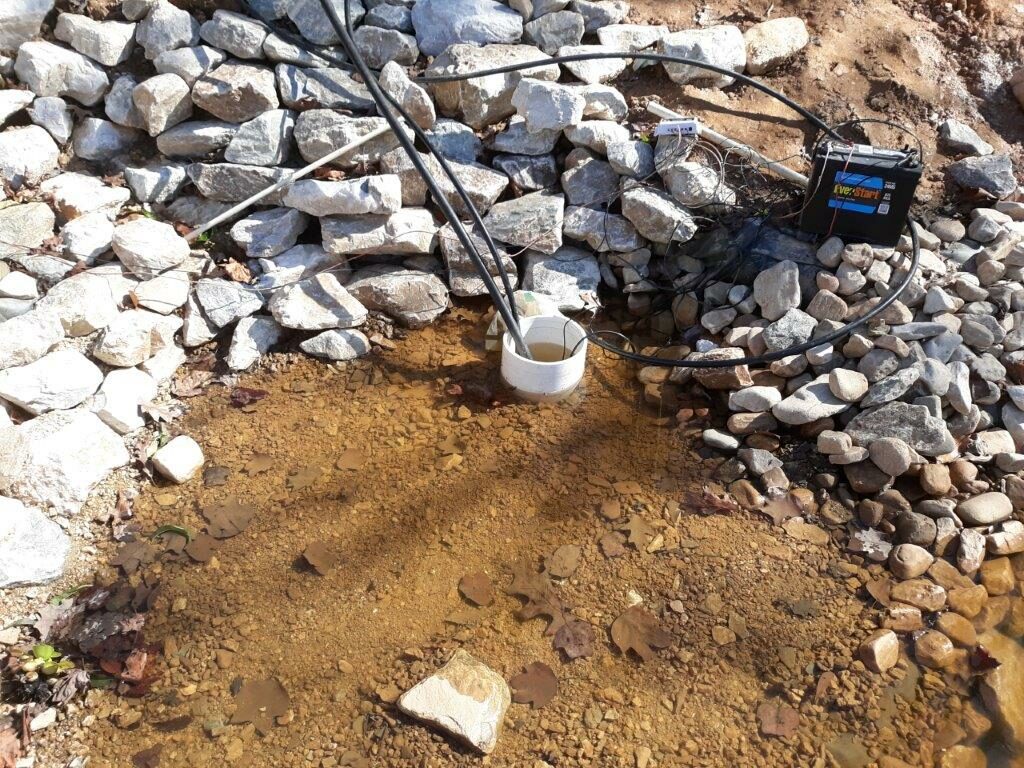
Batteries powering waterfall pumps
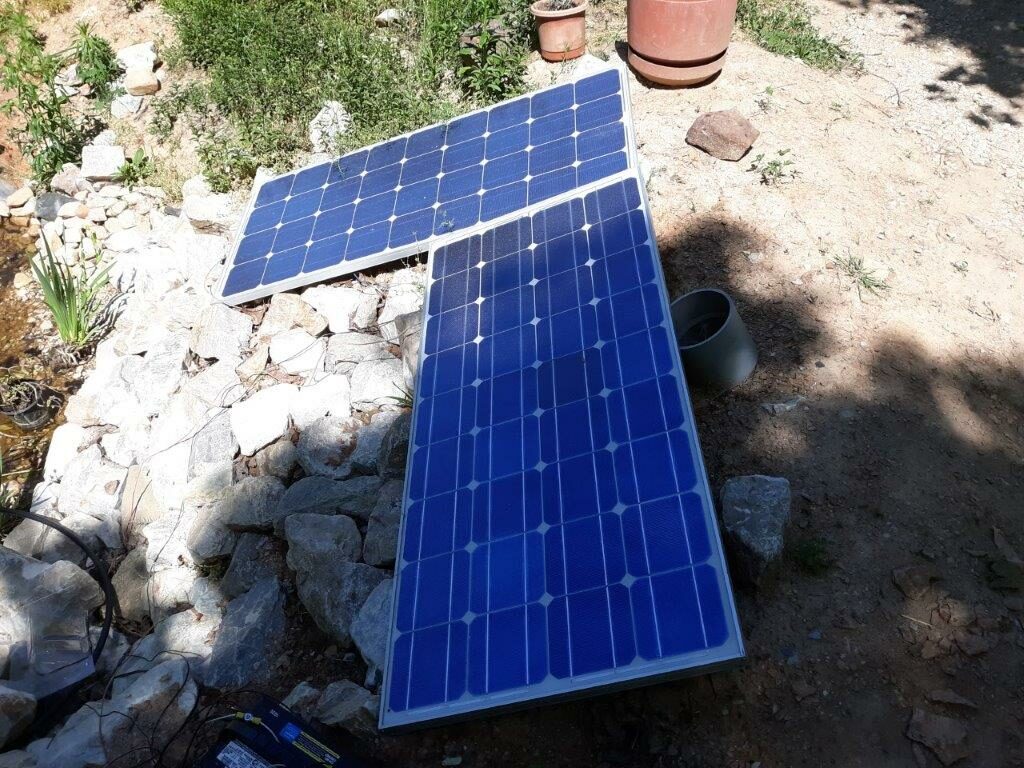
solar for those batteries
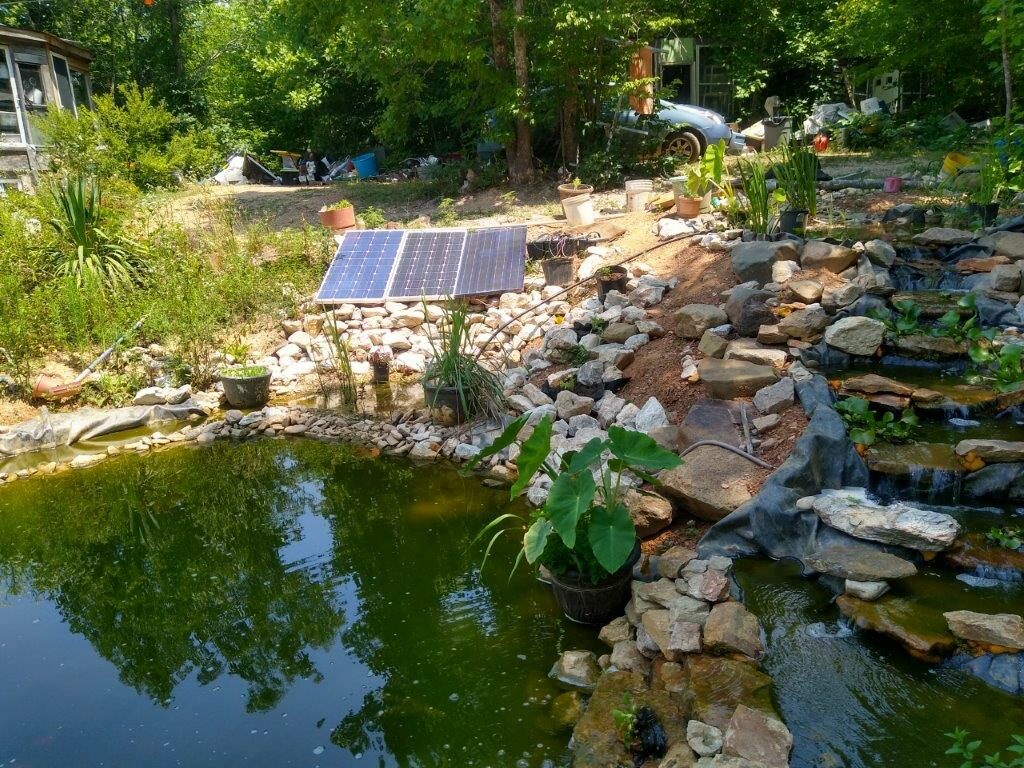
These solar panels detract a little from the natural feel of the pond and waterfall, but they put forward the idea that these “luxuries” should at least be energy independent.
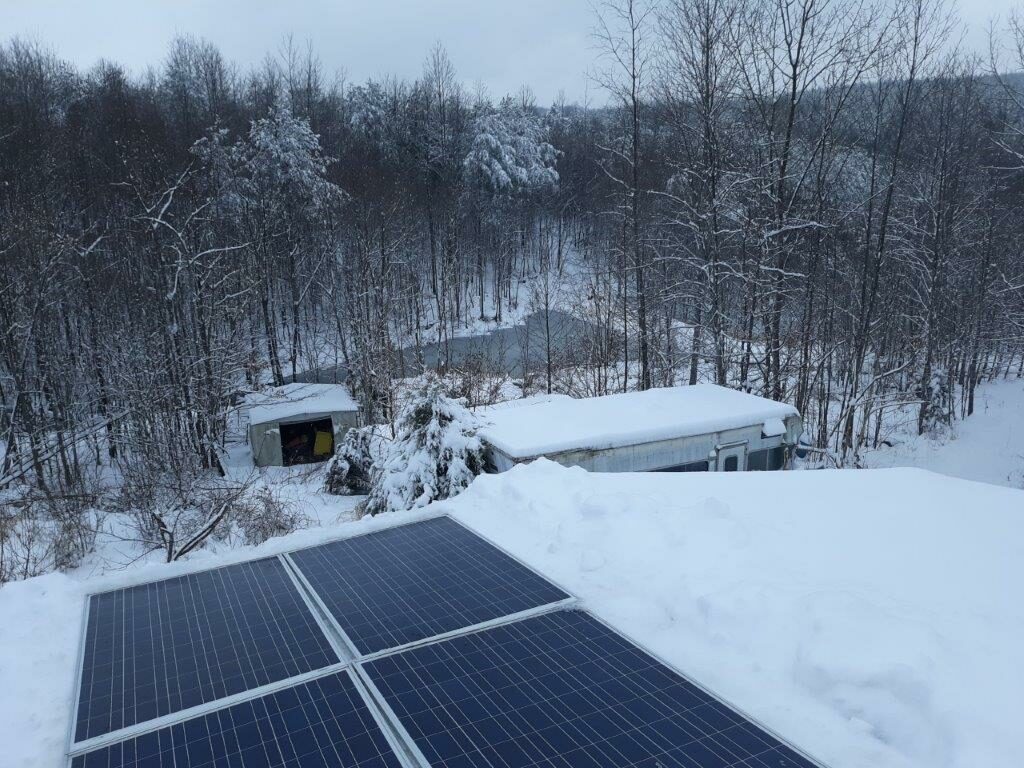
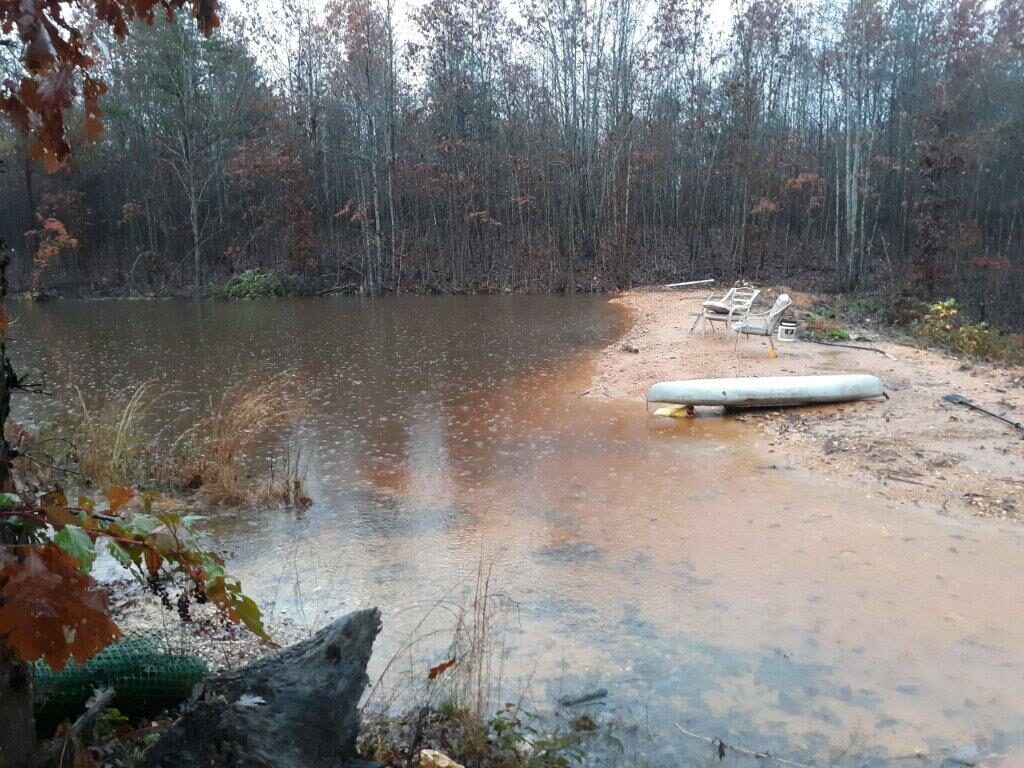
Cleaning panels I thought I’d take a picture–pond at top of picture is the middle/swimming pond, although no swimming today.Greenhouse koi pond, about 60 fish, hungry and growing fast.The catfish pond, so called because shortly after it started holding water I put in 25 small blue channel cats. somehow they have survived low water and algae, and there’s either a ton of babies from last year, or just a couple of originals (at about 20 inches long now) or some number in betweenthe rainfall this year has taken this from a low water quality algae/catfish pond to a possible swimming pond. also like to put the kayak in for a restful drift around on the waterOutside koi pond has clarified, fish inactive, some under flat rock which makes a cave for them on bottom of pond2 or 3 of the bigger koi are out on the bottom getting some sun, but with the reflections the picture doesn’t show them very well.
I hate to say this, but I fell down on the job of taking pictures of the rebuild, so I’ll do my best to fill in the gaps with descriptions.
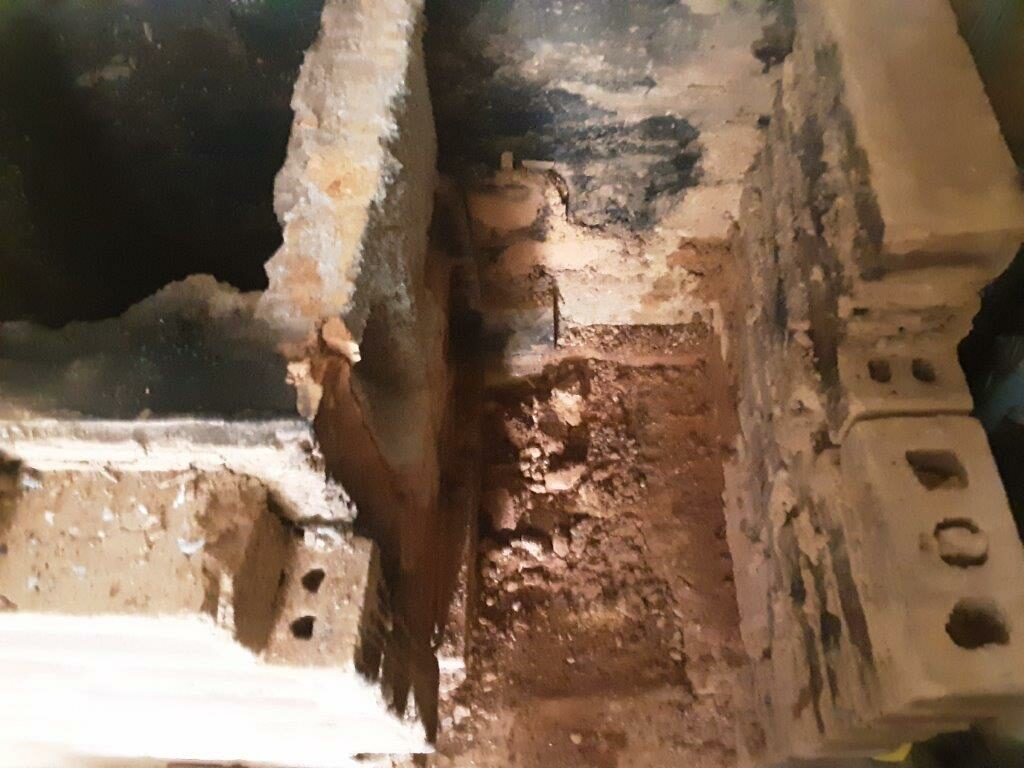
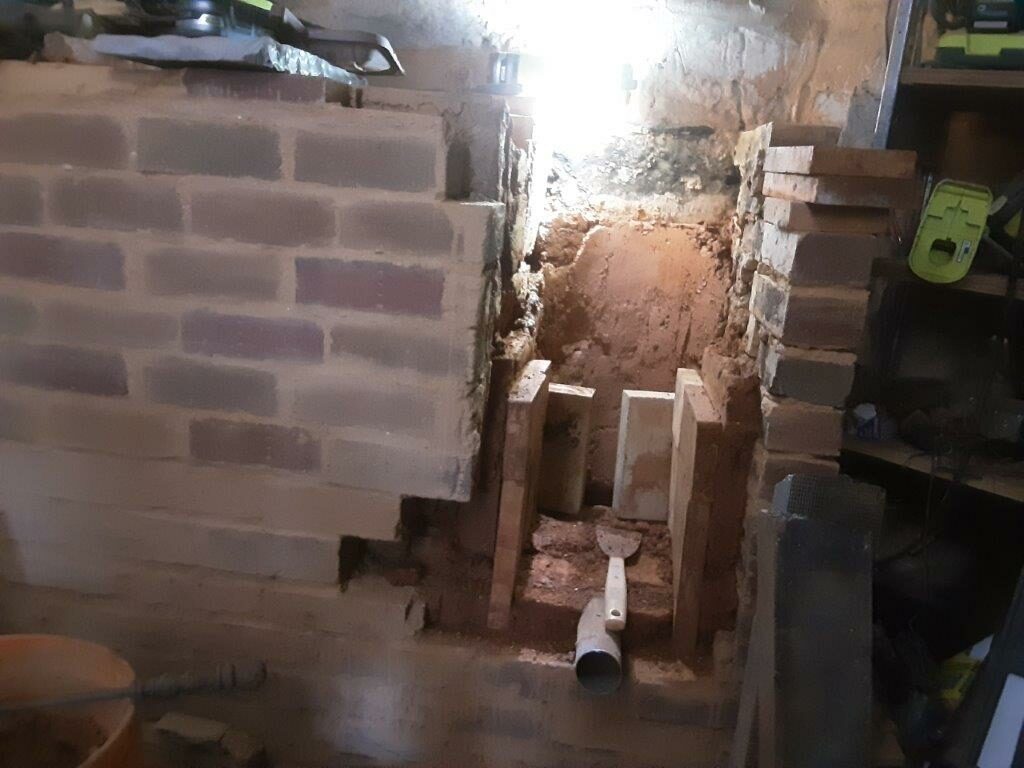
Empty hole in the overall build where the DSR used to be. The DSR2 has almost the same dimensions, although in order to fit in the riser in back, I moved the firebox forward in the opening and shortened it a bit The existing clay/perlite lining was mostly removed on the back and right side, leaving the concrete in back and brick side wall
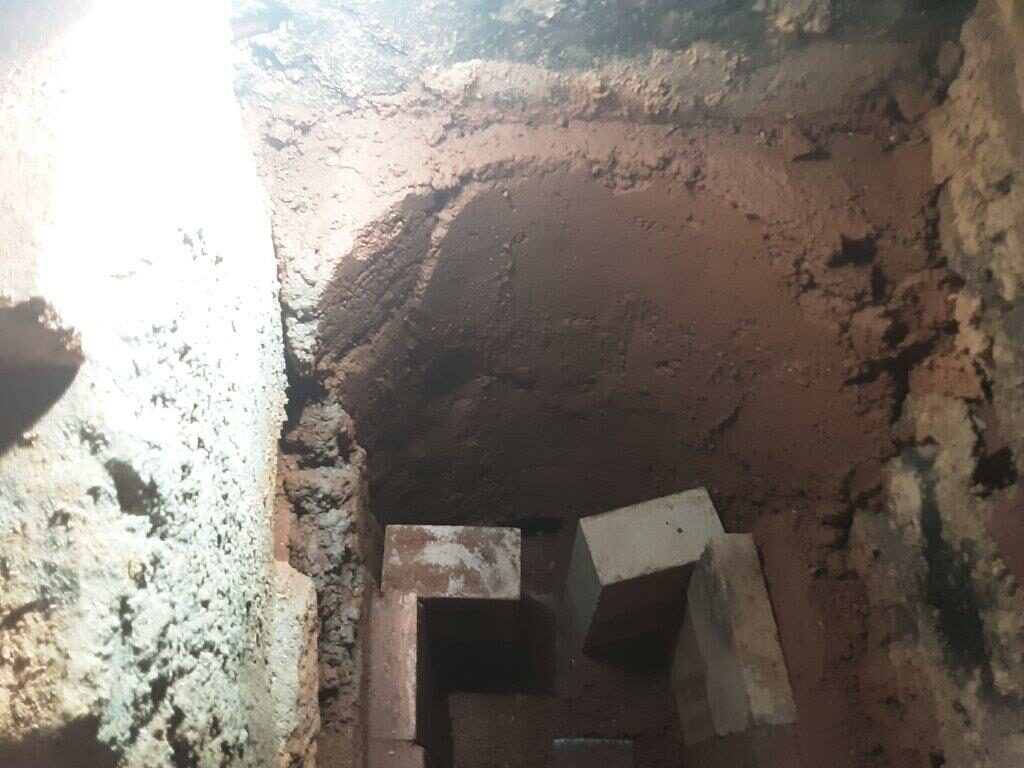
This shows the beginning sculpting of the back riser, and the first level packing of both left and right sides with the perlite clay mix behind the fire bricks.
Front view of same construction detail.
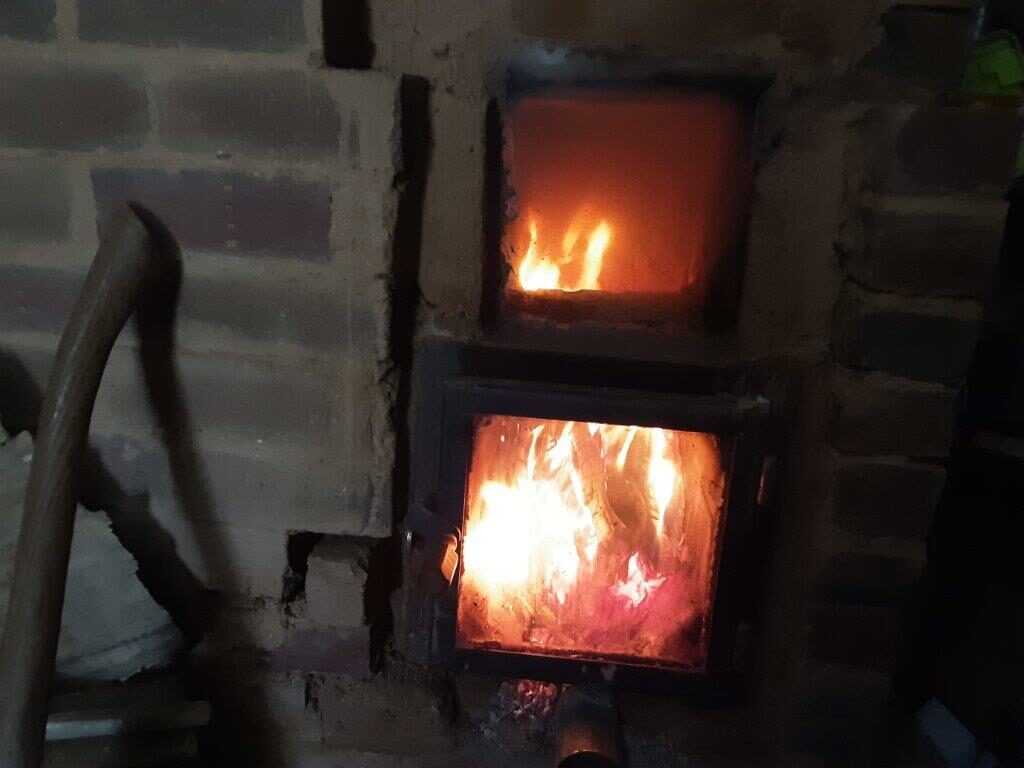
Fast forward to completion and clay is almost dry now after about three fires.
Again apologies for not following the construction more closely with pictures. The level separation between the firebox and the secondary burn chamber was made using a cast refractory cement slab, since the fire bricks were not really long enough without slanting them in or robbing more space from the firebox. The door and frame were welded up by a friend , just a few angle pieces and some flat stock. The glass is set in the frame in a bed of clay, with a woven fiberglass gasket running around the edge. I’ll try and get some more detail pics on the door frame later. The frame is held in place with a piece of steel rod welded to the back of the flat stock and embedded in the clay on both sides of the fire bricks
In the old DSR I used the glass stove top as the top of the secondary burn chamber, but in this one I actually lowered the whole construction several inches below the old level to make room for a space between the top of that chamber and the glass stove top. Again I used cast refractory cement slabs for that internal ceiling, and in this version of the stove the exhaust is on top instead of to the side.
Overall this unit is performing better in all ways. I still use the ceramic fiber blanket to push the heat over to the water tank most of the time, but when it is not in place, temperature checks show less intense heat in single spots, but greater heat overall. I have not had a lot of time to play with this version in terms of taking lots of measurements, but it is easily hitting 1000 plus degrees,
I also have started a burn technique after it hits the coaling stage of throwing in a couple small pieces of wood to help keep the after burner ignited, and I believe in this way I get a more complete burn during the coaling stage. Of course this falls under the heading of playing with the fire, so when I don’t have a lot of time, I just load a second half load or so of wood right on top of the coals, close the door and walk away.
I did leave out some of the finer details in my haste to get this working. Once again I seemed to only have time to coast a few days on passive solar heat while rushing to implement the new build to restore a more comfortable temperature.
The stumbling block in the top chamber is not yet in place, and I kept the secondary air supply at the bottom of the heat riser, although I think the design showed that was no longer necessary. Truth be told I haven’t had a lot of time to revisit the details of the design and was going mostly by memory and expediency. There are a couple refinements I might like to add, but I’m quite pleased in general with this latest iteration.
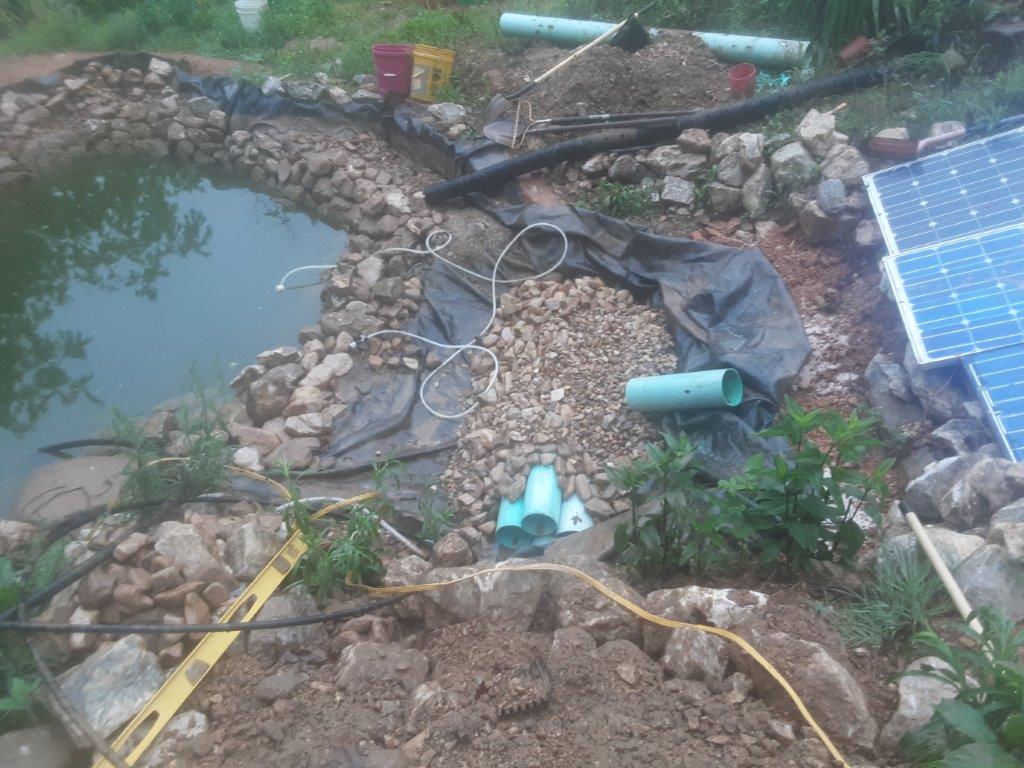
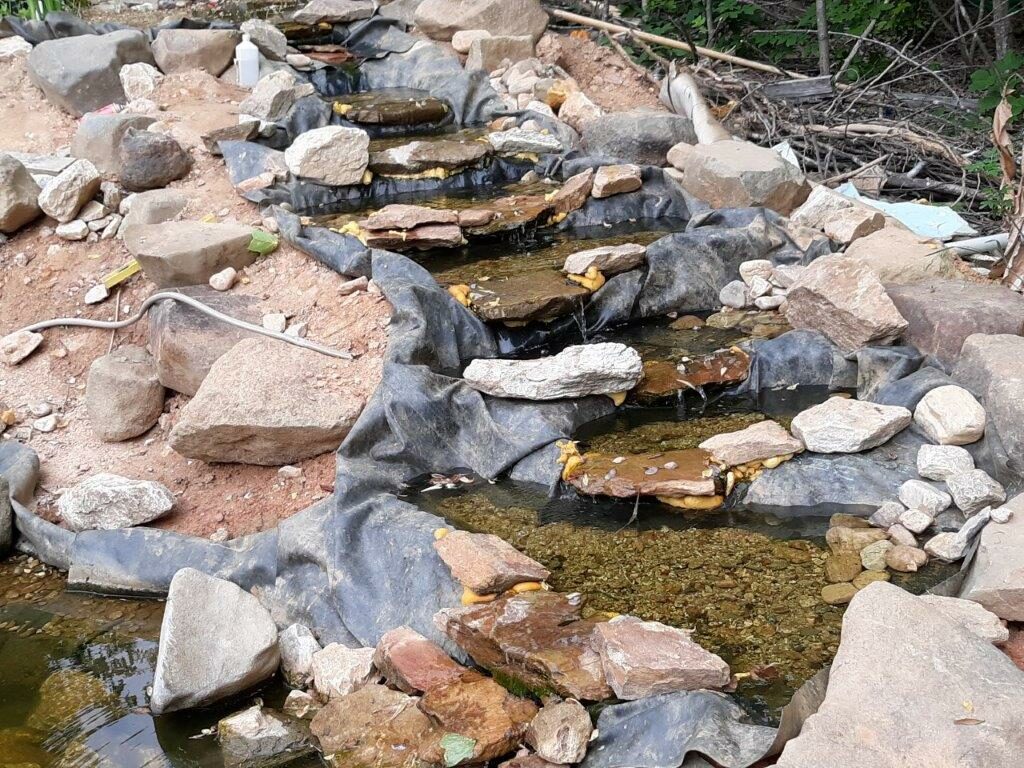
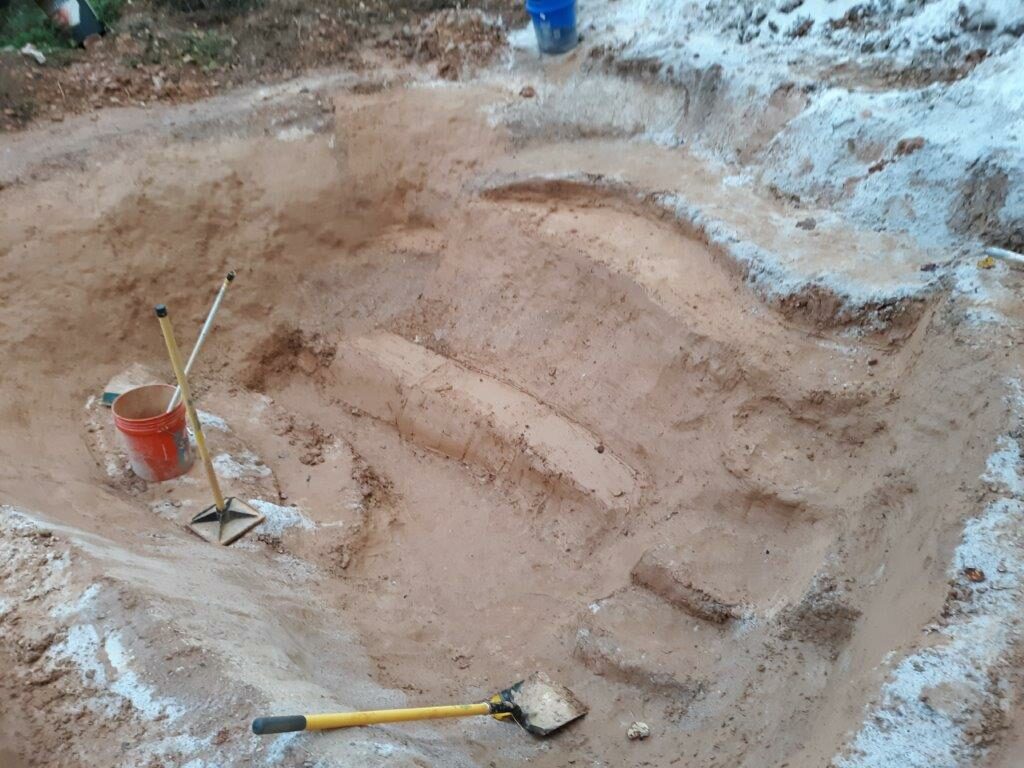
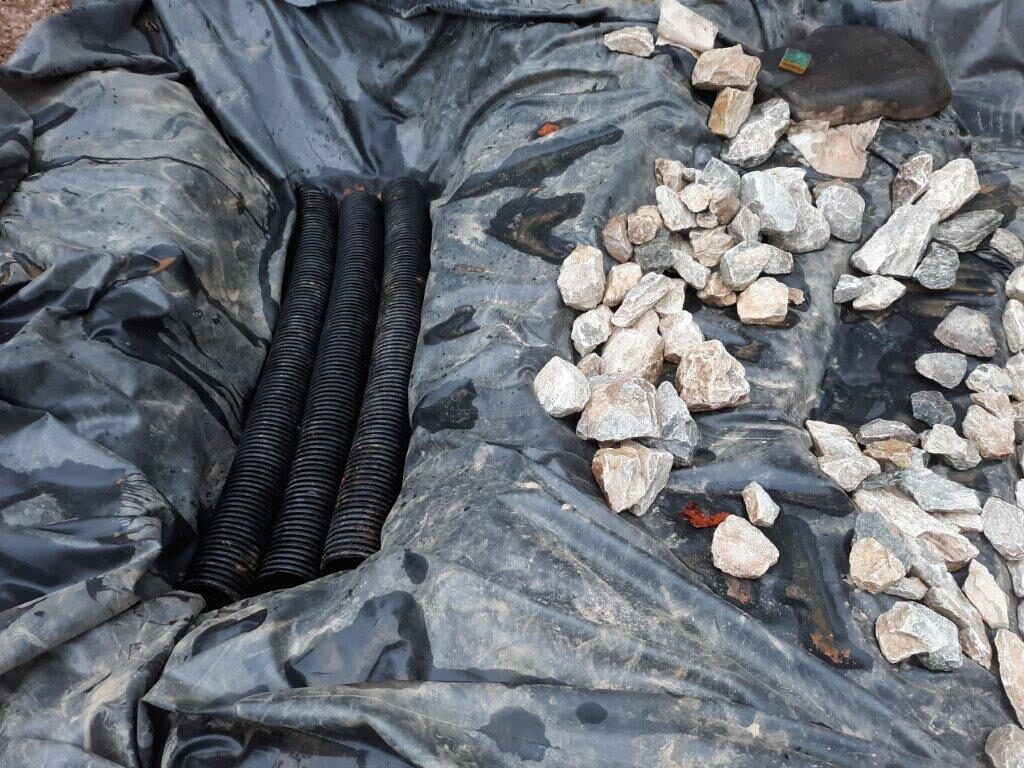
These koi are growing out in this small patio pond, while their bigger pond is under constructiongreat fun sculpting the earth, trying to get all sharp rocks and roots out of the waythis pond gets a liner, previous excavations in this area showed the clay was not good enough to have a reliable mud bottom pond.The first rock-in was underway when rain flooded behind the liner and totally screwed up everything, the second attempt will have extra experience to build on and a built in siphon hose to drain water if necessaryAlthough aqua blox are the preferred structure for a wetland filter because they allow a faster transfer rate, these septic lines should handle the lower flow I’ll be using, but the question is whether these filters will be adequate to keep the water clear.the septic pipes are first covered with coarse rock, then the finer gravel sand mixture from the creek. Water from the pond flows in and covers the sand continuously, making this filter act as a skimmer. Notice the white PVC access pipe that contains two submersible pumps. this second wetland filter has water pumped up from the first filter, sent to the water chamber underneath , The water then filters up through the gravel, and acts as the source for the waterfall/ stream that oxygenates the water and feeds it back to the pond.The skimmer/first wetland filter is slightly left of center beneath the solar panels. The second filter is top right center. Note the black liner to the right that will be the waterfall stream bed coming back to the pondTop sees a small cold frame(lettuces anyone?) on the upper wetland filter, coming across to the waterfall bed. Working with the big rocks is no fun alone, so I’ve settled on a method where the big rocks are outside the liner, making it easier to manage.
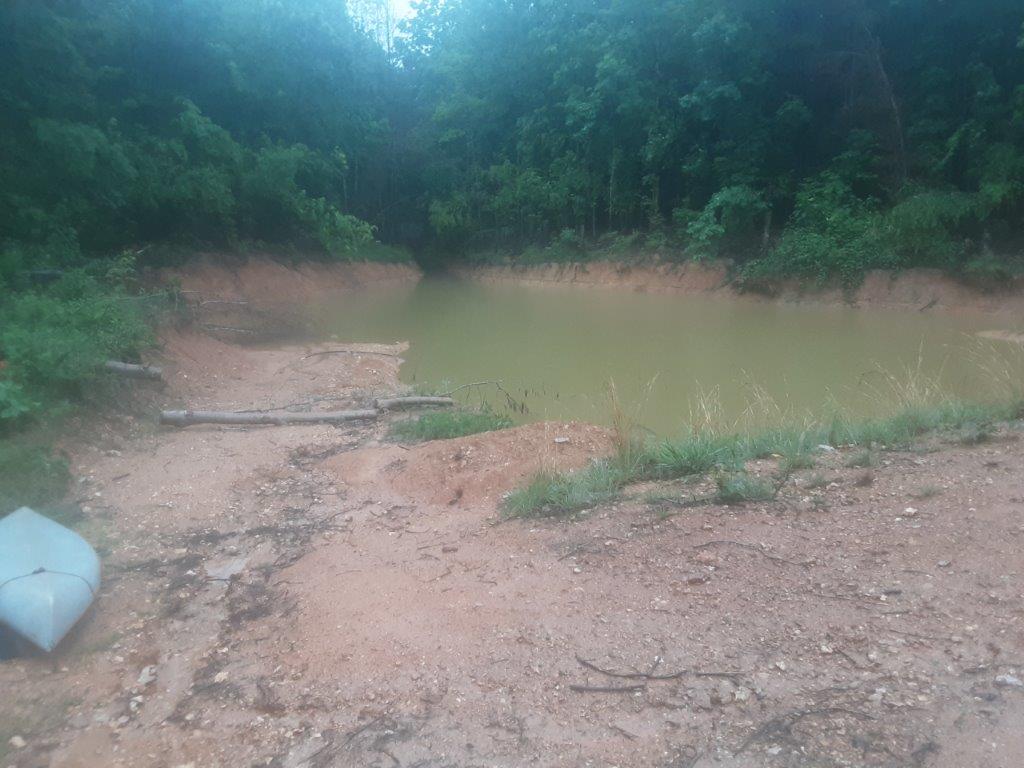
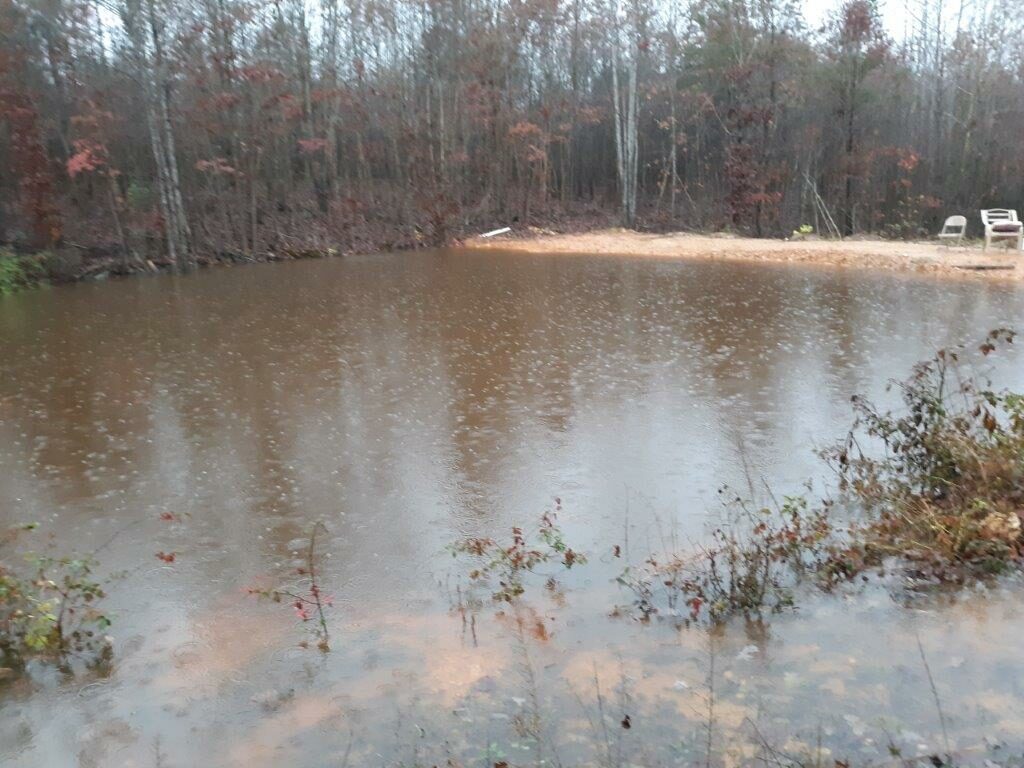
While the rain complicated the koi pond, washing lots of mud into water that had finally started to clear, the rains filled and clarified the upper “catfish” pond. It’s especially true that larger ponds require less maintenance.
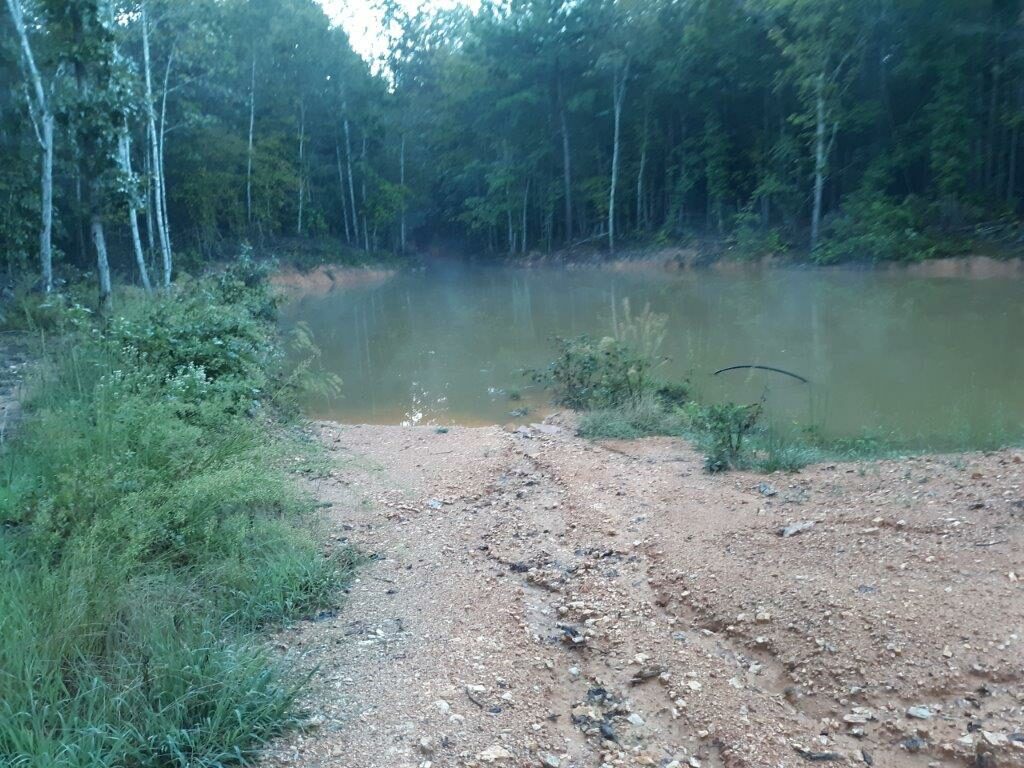
Note that these ponds are mostly unavoidable when doing erosion control . A pond lined with sedimentary rock in many places like this might be expected to empty as fast as it fills, but what actually happens is the back country around the dam starts to fill with water, and slowly the dam will start to hold water longer and longer.at higher and higher levels.
The catfish pond reached a new high over a week ago, but still not fullhere’s another perspective from a couple weeks agoAnd another image looking straight across the damThis is looking down from the spillway area on the ramp leading down into the pond before this last big rain.With another monster rain the pond finally fills. The water foreground to the right is actually the spillway, and will eventually feed a swale that runs all the way to the northern boundary, that then feeds another swale that runs back to the main garden at a lower level.This shot is taken from a new garden that was created by the pond clearing. When full the pond practically touches it. Most of the time this shallow area next to the garden will be dry. Still, with the water table this high, the soil and plants should do very well.another perspective of the full pond.
Usually I pick a theme and possibly support it with pictures, This post is going to just show pictures with brief descriptions, and maybe a theme will develop
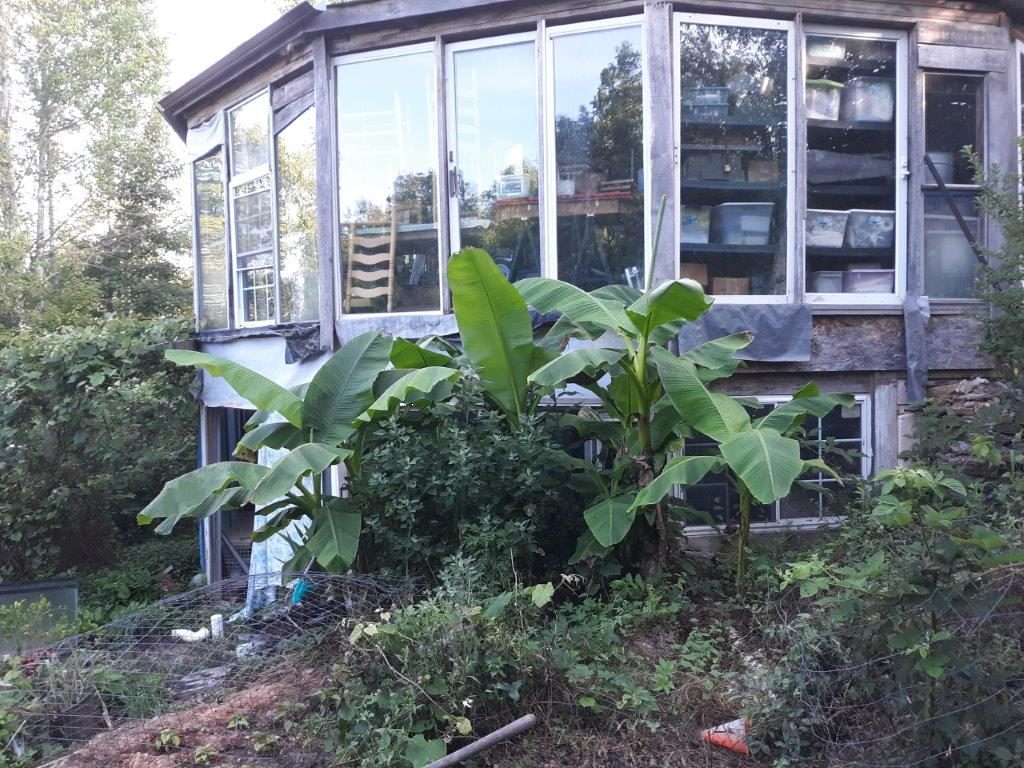
exceptionally warm weather early, the bananas were suckered into coming up early, and then were hit by several hard frosts, still, they managed to thrive. I transplanted about three backhoe buckets of roots this spring down to the middle swale and those bananas are also thriving. I like banana leaves for mulch applications to control weeds.
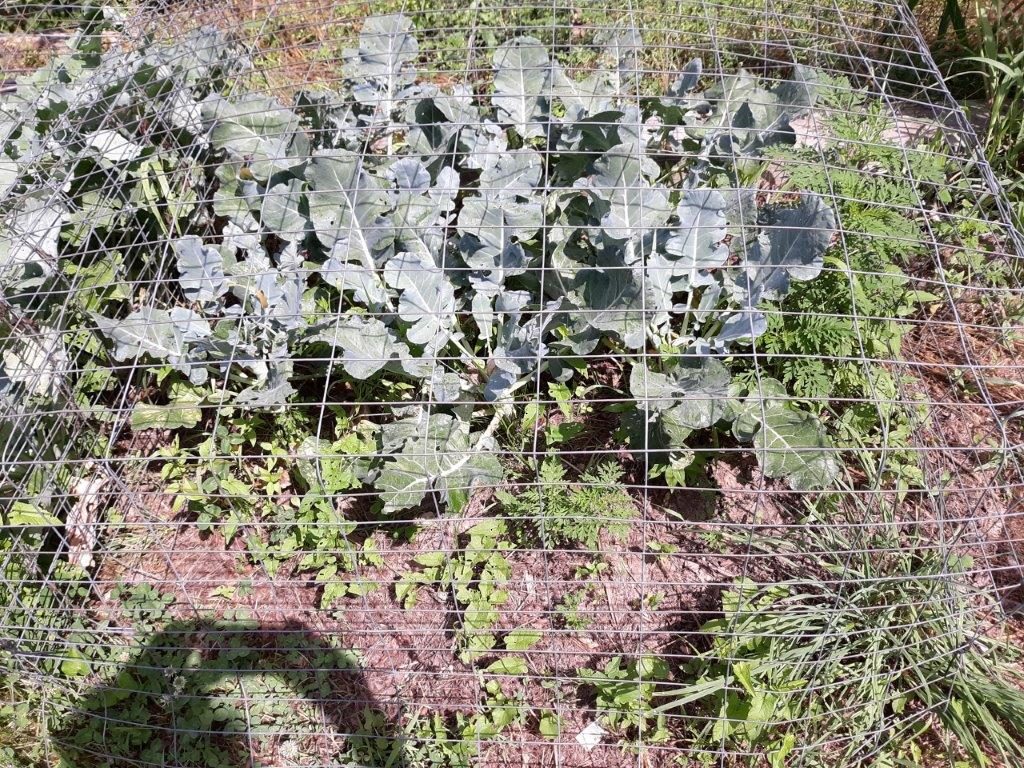
Now, if you look close there is a wire cage (lower left), protecting a slew of hot peppers just put in where bananas used to be.
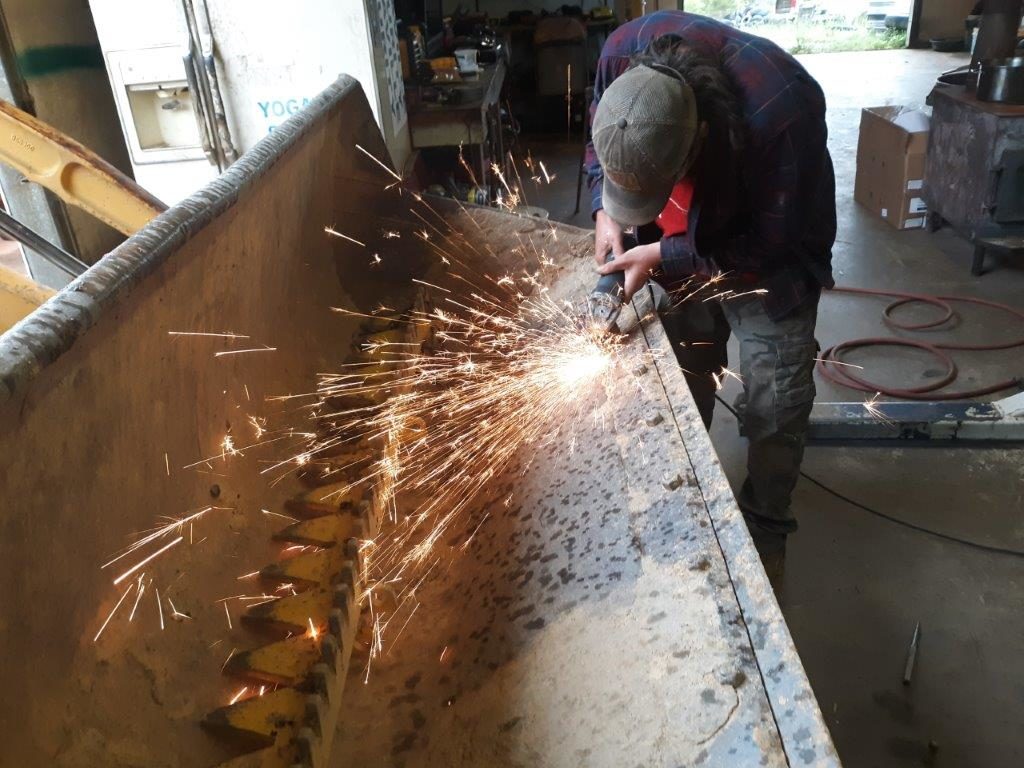
Backhoe, front loader bucket needed welding, seems like with machines there’s always something. This is not the only repair this year, but the backhoe got some good use when I was digging swales , pulling stumps, planting trees. I don’t mind a little TLC for all the work it does.
This is the middle pond after a heavy rain, note the limestone gravel at the back of the dam, any water running down the gully gets filtered through that limestone, and this year the water has been much clearer.The muddy water was temporary, due to 5 inches of rain in a 24 hour period.
This is a snake I’ve been watching for several years down in the gully ponds, and he started foraging up to my little ponds near the house. When I found out what he was doing I was trying to figure out what to do, little goldfish were disappearing rapidly, how soon would he start to look at the koi? The problem solved itself, he got caught in a stray piece of chicken wire and died For the time being the koi are safe, but how soon will other critters come by to threaten them?
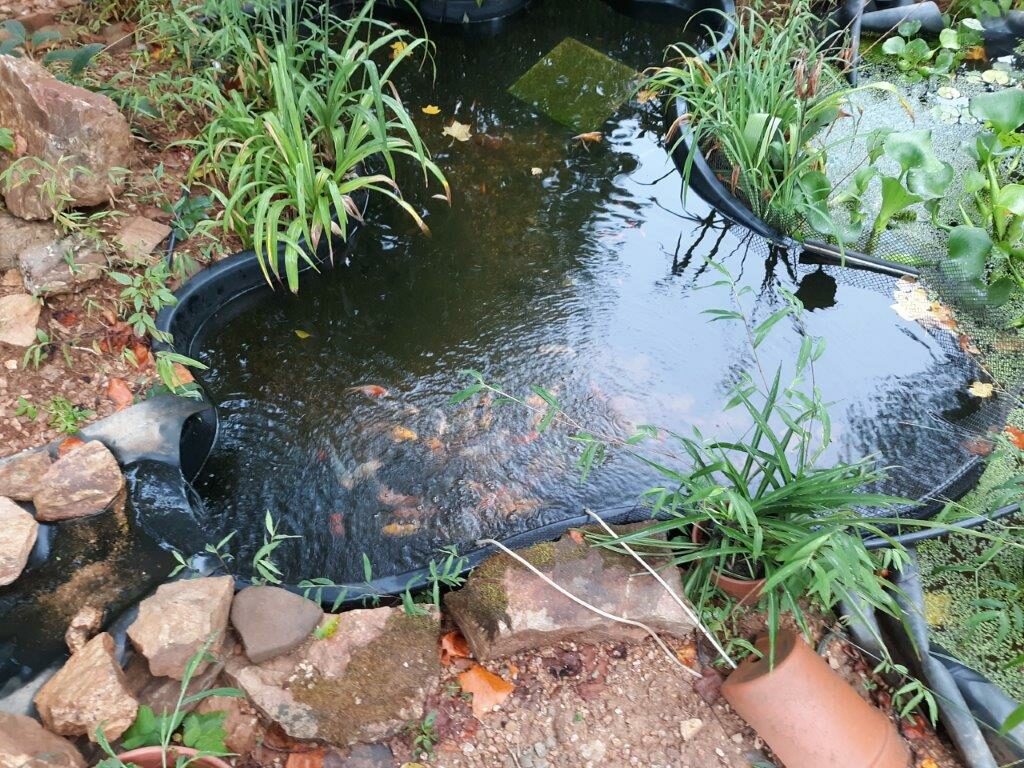
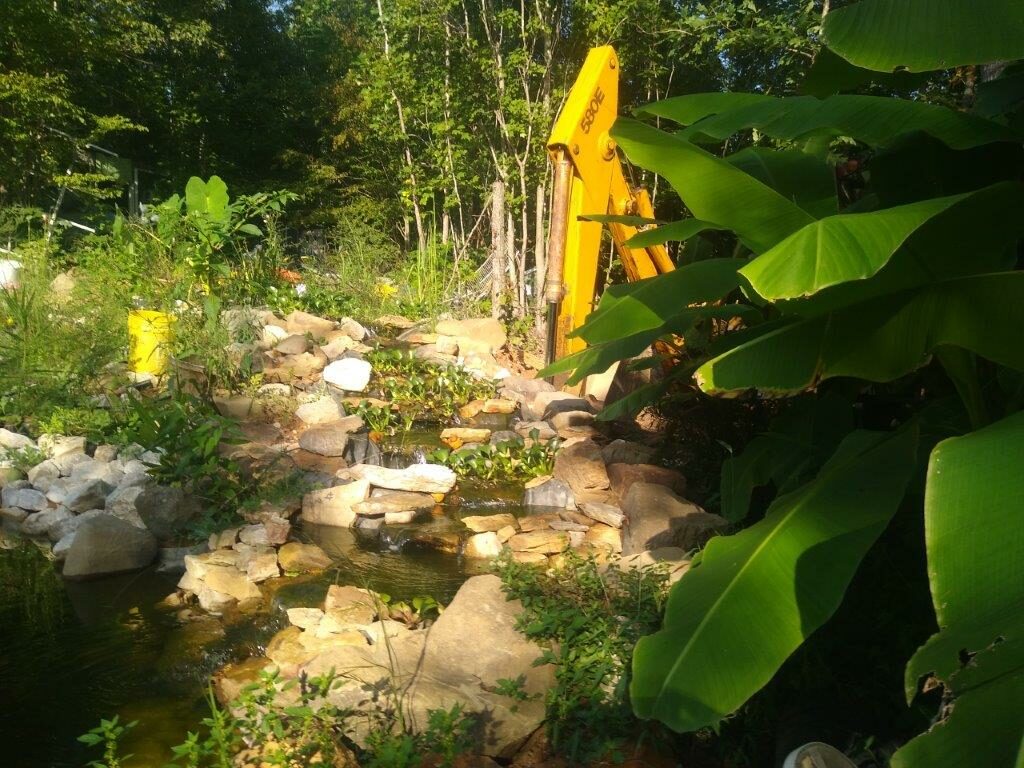
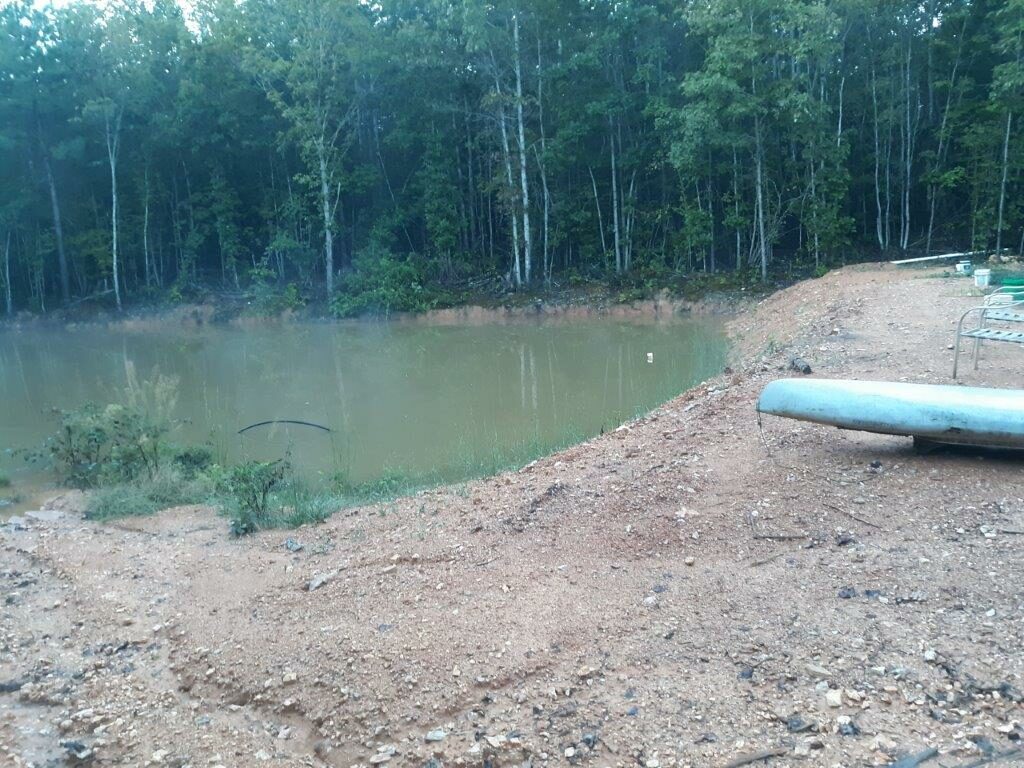
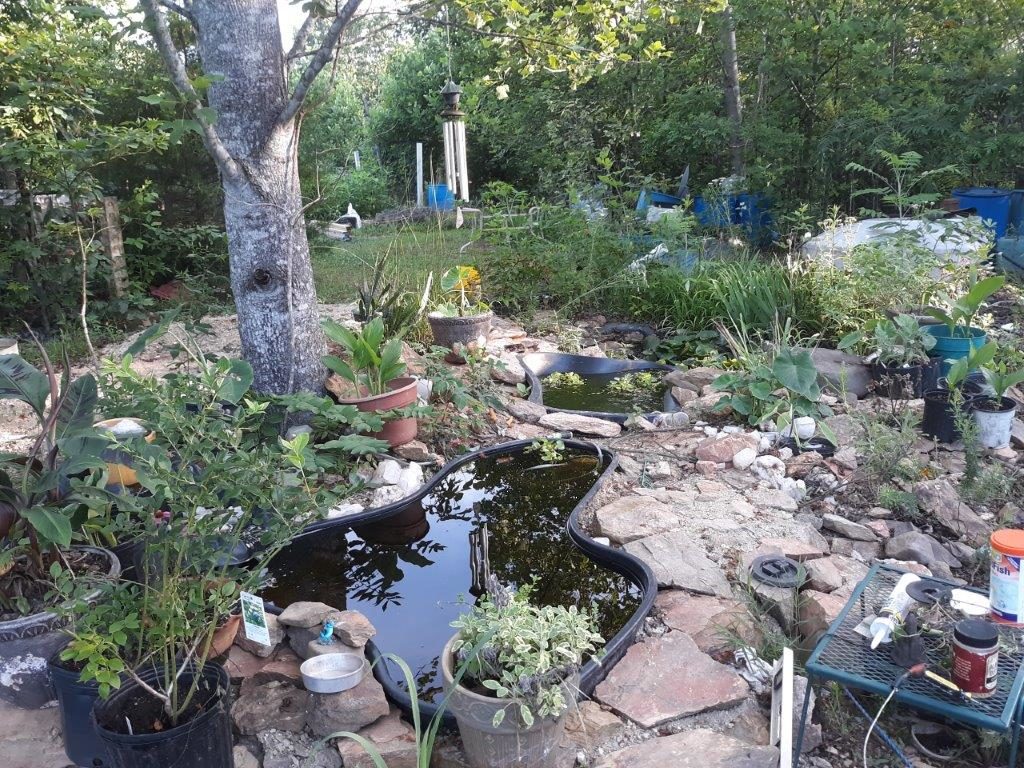
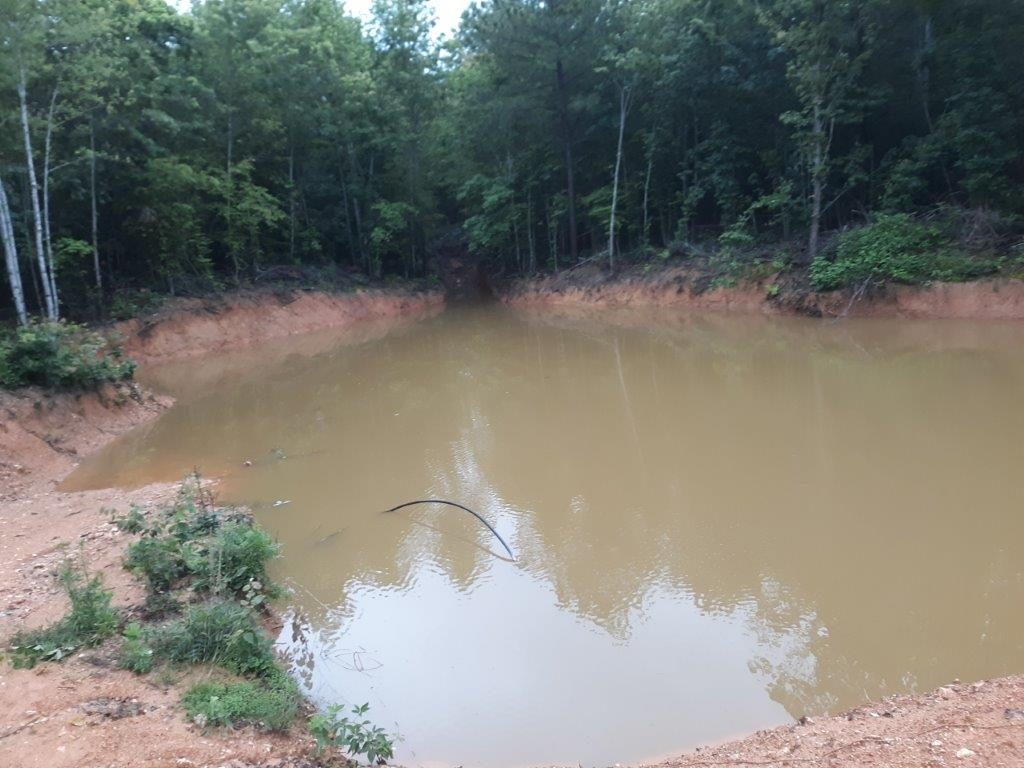
This was the little Koi pond back in April,Here’s the pond in June, Elephant ear tarot, tumeric,lemon grass, sage,lemon sage, banana, lemon verbena, ….. There’s even a place for marshy plants that like their feet wet, bulrushes, snake plants and most recently some horsetail starts.cruciferous aren’t fond of the heat, but i’m still harvesting kale, broccoli, and I think there’s some cabbage in those overstacked plants.This is the biggest pond, and the highest. Not as much rainfall this year, so after building it about 6 feet higher and a good deal wider as well, the dam is cracking a little–from the dry conditions, The arch of black pipe there is meant to be an irrigation pipe, and when the dam fills, it will send water anywhere it needs to go. When the pond finally does fill the green vegetation lower left corner will be underwater, and at its peak even the vegetation upper left, and several feet of the vegetation on the right side will also be underwater.
This pond also has some new mulberry trees planted on both sides, and to the left of the water level is a long area partially shaded where a new garden is taking shape. several tomatoes and peppers are planted to start conditioning the soil, but also a blueberry, grape vine, and kiwi have been started to be part of the perennial crops there. Even the top of the dam, which is clay, got a few mounds of topsoil and watermelons are planted there in full sun.